Friday, January 13, 2012

Gearing Up For PTS7

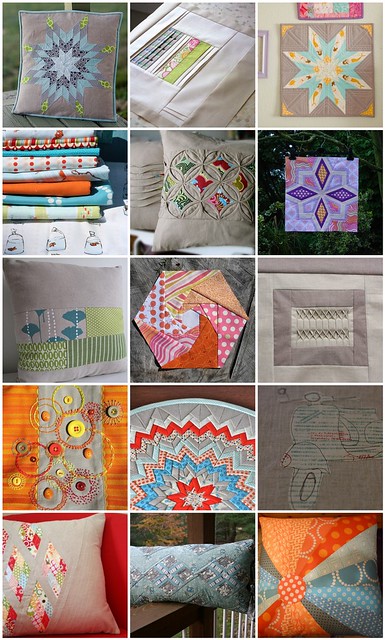
They're gearing up for a new round of the Pillow Talk Swap on Flickr. And although I am cutting back on the number of swaps I'm in this year PTS is definitely on my To-Do List. If you're interested in joining in the fun you should go and sign up to join the Flickr group so you don't miss the announcement for signups , which is coming very soon. This round they're asking us to have our mosaics ready so we can submit them with our intention to join in the swap. This is the mosaic I made this round...

PTS7 Mosaic

I also add notes to my mosaics in all the swaps I am in to help guide my secret partners and give them specific insight into why I picked the images I did. The more swaps I participate in the more I realize how the more information and guidance you can give to a partner really helps. Often you are paired up with partners who have different tastes and aesthetics than you do. That's part of the fun. It helps to get you out of your comfort zone. There is still time if you want to join in the fun. Hop on over to the Flickr Group to get started.

Thursday, January 12, 2012

Little Stitches Week 10 - Pattern F Cap

It's Week 10 of the "Little Stitches" Sew-Along. Don't get me started on the Comfy Jumper Dress. It's still unfinished and in my UFO pile. Not because it's particularly difficult, but because other projects have taken higher priority status over it. Sorry Comfy Jumper. I swear I'll be showcasing you soon! (Is it weird that I'm apologizing to an inanimate object?)

Pattern F - Cap - Difficulty Level: 3

I met Jeremy through my husband. They've been friends for years. Jeremy is part of Marc's pack of guy friends and I've always adored him since the day I met him. That adoration only grew when he started dating Megahn. They're both, now, part of our close inner circle of friends that I call the Venice Crew. We all live in the same neighborhood. We can walk, or bike to each other's homes and I am so lucky to have such a great group of friends who I know I'll have for the rest of my life. Jeremy and Megahn got married in 2010 and they welcomed their first child, Jude, into the world this December. My plan was (and still is) to make a larger gift for them. It's in the works and will be finished soon I hope, but I couldn't go empty-handed to Meaghn's baby shower.
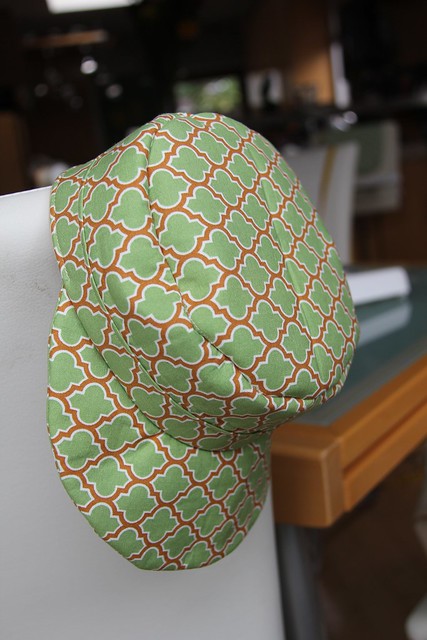

If you're a regular reader of my blog you know my sewing time has been limited lately. On the morning of the shower I was still gift-less so I woke up a little early to make her just a little something to tide her over until I could finish her real gift. And as they're one of the few people of the MANY (and the list keeps growing) people I know having babies that knew they were having a boy so I thought this little hat would be perfect, and quick.


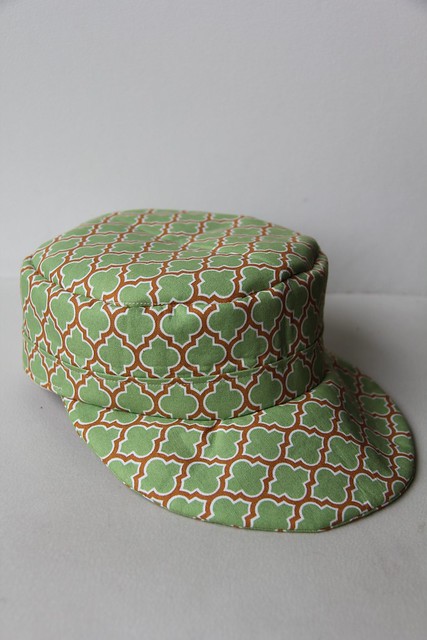
I cut into this green lattice fabric that I've had stashed forever. It's simple but a favorite of mine. The only problem is, when I was cutting it was early and I wasn't concentrating properly so I also cut the portions of the other hat listed in this pattern from this fabric as well, so some day you'll see this fabric again when I get around to making the butterfly hat.


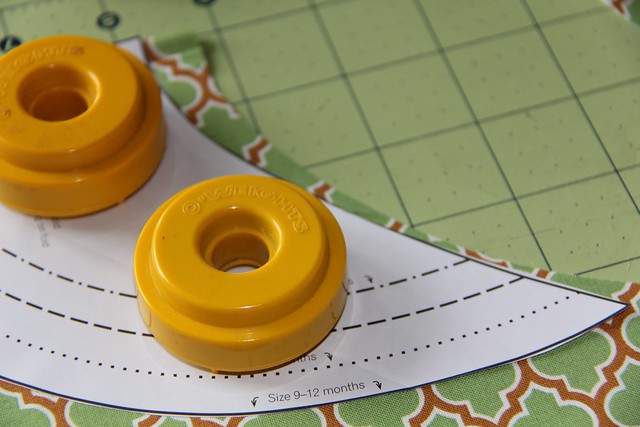
When you're laying out your pattern pieces for the brim of the cap you can try to nestle the curve of the pattern piece into the curve of the fabric where you just cut. It doesn't fit exactly but you can get somewhat close to help save some of the fabric waste.


This one came together pretty well, but if you're nervous about curves this definitely has a lot of them. My advice is to take your time on the curves. Reinforcing your seams and snipping into the curves to help ease them around is key. Don't cut corners there. (No pun intended!) When you're snipping into your seams be careful that you don't cut in too close to the seam allowance, as these can fray over time if you don't give yourself proper distance from the tip of the snip and the actual seam. But it is a very important step. This helps to reduce bulk and make your curves easier and smoother. I recommend using a pair of small, sharp scissors whenever you clip into a seam allowance.


The only real problem I ran into when making the cap was that my lining ended up just slightly (less than a 1/4") bigger around the band area than the exterior of my cap. I could have easily solved this by stitching a slightly tighter seam into the band, but unfortunately for me I was rapidly running out of time so I fudged it.


The lining isn't as pretty and tailored as it should be but I was able to slightly gather the small overlap when I was stitching the lining to the exterior, which created a slight pucker in the lining. I justified this error because it's on the lining and will never bee seen when worn and I just plain didn't have time to fix it. Instead I affixed my label over the pucker to try to hide it as much as possible. Megahn was pleased with it, so in the end, that's all that matters. I can't wait until Jude is old enough to wear it because I think he's going to look incredibly dapper. It's just so cute and it's easy enough to make in a morning.


So what are you working on? Link up your latest projects here and show everyone what you're making. You can share your projects in any state from start to finish. I'll keep the linky party open all week. Remember you can also show off your "Little Stitches" projects anytime in the Undercover Crafter Sew-Along Group on Flickr.


See you next week when I'll show you my latest finish: Pattern K: The Modern Diaper Bag.
Wednesday, January 11, 2012

Machine Problems

I have so many UFOs on my plate right now, but I couldn't resist starting a small project for me. I recently got a new laptop so I wanted to make myself a laptop cover to protect it. I thought this would be a quick and simple project, but it seems that nothing is quick and simple in my life right now.


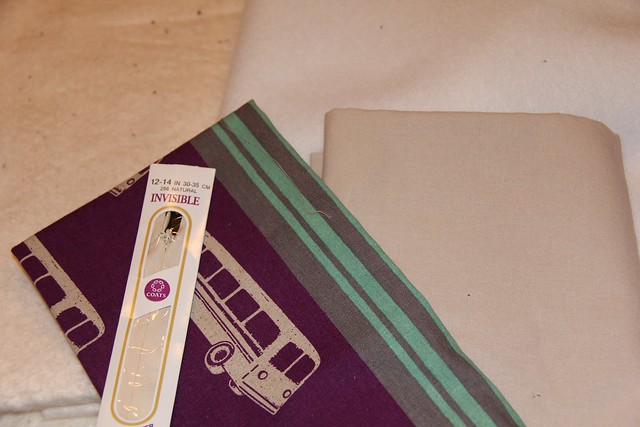
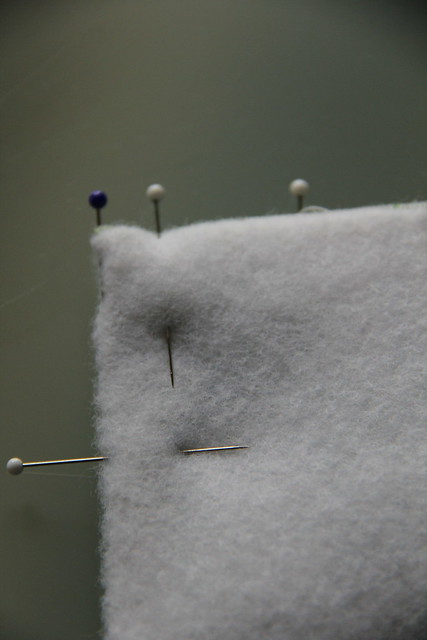
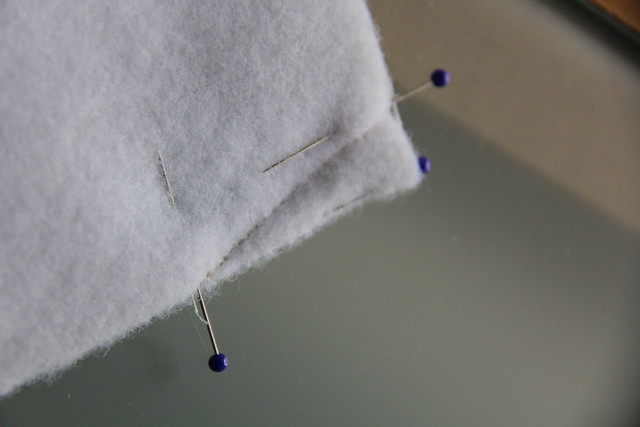
I started by dipping into my coveted Echino stash to find just the right print. I pilled some fusible fleece for the padding, some neutral linen for the lining and a matching invisible zipper to seal it up. Then I encountered a problem... I don't have a zipper foot on my little Janome and the one from my Baby Lock isn't compatible so I always attach zippers with my Baby Lock. Unfortunately the foot arm on my Baby Lock has come loose and won't keep a proper needle position. It shifts all the way from here...


... To here...


Notice how the needle position skews from the back of the foot to the front of the foot? And when I try to center the needle into the right position it won't stay in place. Problem is, I haven't been able to figure out how to tighten the foot arm. Any ideas? Have you experienced anything like this? I am probably missing something stupid. Let me know if you have any suggestions otherwise I see a trip to Tanner's for a tune up in my future. She's about due anyway.

P.S. I've been noticing some bad links to some photos in older posts so I've been trying to clean things up around here. I hope this hasn't resulted in anyone getting sent links or updates to old posts. If you see something weird or bothersome please let me know. I'm about 1/3 of my way through the cleanup.

Tuesday, January 10, 2012

Triple 'T' Tuesdays: New Way to Mark Fabric

Two things... You want to see the product of all the blood, sweat and tears I've expressed over the past eight months? Well then set your DVRs to record because the brand new season of Tabatha Takes Over premieres tonight at 10 PM EST on Bravo! This season Tabatha doesn't only take over salons, she also takes over a variety of other businesses. I've been working on this show since the very first season and it's a labor of love. And if you look really close you can see my name in lights!


Enough about that. Are you ready to welcome back one of my regular features, because it's Triple "T" Tuesdays. I know it's been a while since I posted a Tip, Tool or Technique around here. I've been busy. I'm so sorry. And I think I'm just going to make this a monthly feature for now, because the pressure of trying to keep up while working an insane schedule was getting to me. So today I want to share a technique I use for fabric marking. My sewing box is loaded with a variety of fabric markers, from disappearing ink pens to chalk. My general go-to tool used to be the disappearing in pen. And I do still use it, but I have found myself, more often than not, resorting to a new way of marking my fabrics as of late.


The problem with disappearing ink (or water soluble) fabric pens is that the ink will set if exposed to intense heat, like an iron. I've been getting back to my roots and doing a lot more garment sewing and I was finding that I would be working at a speed where I would need / want to do some pressing on my projects before the ink would completely vanish. I tried using water to speed up the removal process, but even that wasn't working for me, so I started using straight pins as markers.

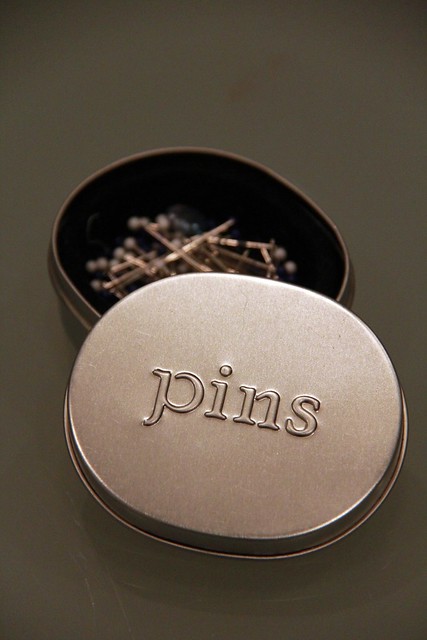
IMG_7405

Straight pins are a great, cheap and easy way to mark your pattern pieces without leaving a trace behind on your fabric. Now, when I'm cutting out a pattern piece I use straight pins to "transfer" pattern markings rather than cutting into the seam allowance. It doesn't disrupt the integrity of the fabric and they don't disappear if I have to step away from a project longer than a ink marking might remain - although I do have to take care to make sure the pins are anchored deep enough so they don't fall out.


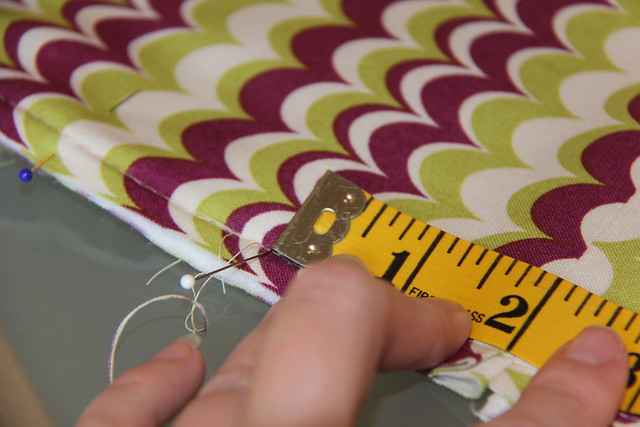
Also, when making pleats or darts it's so much easier to match up your lines using straight pins than ink marks on fabric. Recently when I was making a pleat I simply measured the required 2" from the seam and placed my straight pin in the fabric, flush with the edge of my measuring tape.

IMG_7362

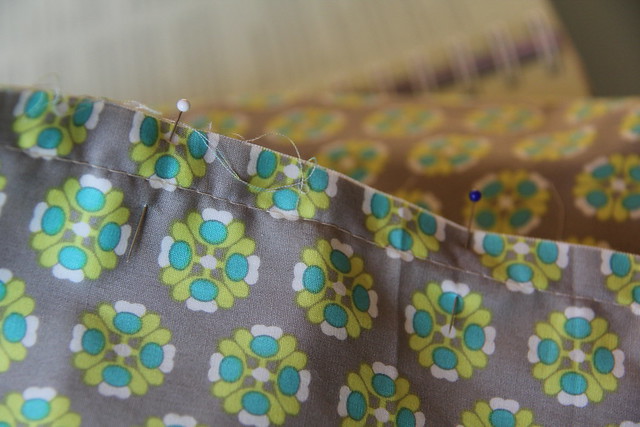
After I made my marks I used the head of the pins as my guide and matched them up, removing one of the pins and then sliding it through both layers of fabric to secure my pleat mark. Then walla! I was ready to stitch my pleat seam parallel to my straight pin marker.

IMG_6879

IMG_6881


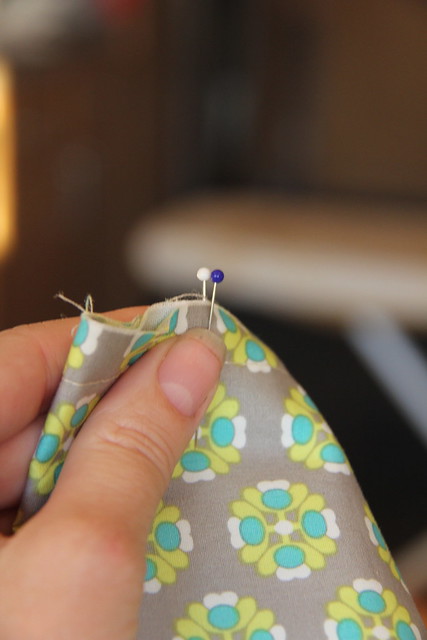
When making a dart I use a similar method. I mark the top edges of my dart with straight pins and bring them together, joining the marks. Then I measure down, as far as I want the dart to go down the edge of the fabric and use another bin to mark the point of the dart.

IMG_6889

Start sewing in a diagonal between the two pins and there you go - a perfect dart without inking or chalking the fabric. Seriously, straight pins are my new favorite way to mark fabric. I think they're one of the most underrated, yet important tools in any sewing kit. How do you mark your fabric? What's your favorite method?

IMG_6892

Hope this helps! Do you have a Tip, Tool or Technique that you'd like to share? Email me and I'll set you up to do a guest post on an upcoming Triple "T" Tuesday. See you next month!

Monday, January 9, 2012

Failure Is Okay

This is a story of failure. And failure is okay. It happens. It's an inevitable part of life. But, especially in my crafty life, I prefer to be a "glass is half full" kind of gal. About a year ago I decided to participate in a round robin for charity hosted by the amazing Julie (Jewel) of the Intrepid Thread. (On a side note, if you haven't seen her online fabric shop you really need to check it out. She always has the most amazing fabrics available!) I had never been in a round robin before, nor had I really ever heard of one before this so I was excited to try it out.

IMG_7371

The plan was simple. Each participant would create a quilt center and then send it to the next person on the list, along with some fabric. That person would add to the quilt center and send it to the next person until it was returned to me. We were supposed to have the completed quilt tops in May for us to finish and the plan was to donate the completed quilts to Quilt Hope In. They would sell the quilts on their Etsy site and the proceeds were to be donated to Haiti relief efforts. Unfortunately it didn't work out that way.

IMG_7378

Somewhere a long the way people dropped the ball. It happens. That's life. And I honestly don't harbor any ill will against anyone. I had completely written this quilt off until a package arrived at my doorstep on Saturday. Julie had managed to track down my quilt center and was even so kind enough as to add her round to it. She was so sweet and apologetic (unnecessarily so since none of this was her fault) and included some amazing Ty Pennington fabric for me. I know that this project has caused her a lot of stress and I feel so badly for her trying to track down missing persons in places unknown. Her heart was in the right place, organizing this round robin, and the problems we encountered were not her fault. What just adds more salt to the wound; I don't think she was able to recover her own quilt in this mess. Since I was never expecting to see this project again, it was actually a welcome surprise that made me smile. See - glass half full. My only regret from the experience is that I believe Julie has been soured on round robins, and that's a shame, because she's very talented and I would love to work with her again. Hopefully we can find another project in the future to collaborate on together.

IMG_7381

What's the moral of the story? You've got to get out there and try new things. Sometimes they succeed and sometimes they end in failure but just let go and enjoy the ride no matter the outcome. I go into every new endeavor, crafty or not, with joy and minimal expectations. Life is too short. Shit happens and even if I never received my quilt top back at least I learned some stuff from this experience. But since I have it back in my possession I think I'm still going to finish the quilt and donate it, so I am sure you will see this quilt again in the future.

Friday, January 6, 2012

2011 Finishes

As the first week of 2012 is coming to an end I thought I would hop onto the 2011 Finishes bandwagon before bringing myself into the new year. When I started thinking about all my finishes last year t struck me that I didn't have many quilts in that category. As I started looking through my photos I realized that there were a couple more than I realized but it was a light quilting year for me - although I do have several quilt tops from 2011 in the cue to finish this year. Swaps aside, since much of my sewing this year was swap related, as I've already showed you, I did venture into doing a few commission pieces this year for the first time. And as usual, all of my non-swap finishes were gifts for others, but at least one of those resides in my own home since it was a gift for my wonderful and amazing husband.

2011 Finishes

So 2011 was a more productive year that I thought when reflecting back in my own brain. And while the end of the year my sewing came (almost) to a screeching halt due to work, I'm anticipating that 2012 will be even better than the last. Here's to a creative and productive New Year!

Thursday, January 5, 2012

Happy New Year!


Happy New Year everyone! I know I am a little late with the New Year wishes but as soon as the wonderful and amazing husband and I returned from our end of the year road trip I slipped immediately back into work hell. (Yes, I realize I am posting this at 4:45 AM, but don't worry. It's not because I woke up early this morning - it's because I haven't left the office yet.) But there is a light at the end of the tunnel. This project is almost finished and then I can get back to focusing on the things I really care about, Marc, friends, travel and sewing.


This year we only had a week, so our road trip was short. We spent a couple days at my parent's house in northern California and then drove home down the coast with stopovers in San Francisco and Big Sur.


Not bad, eh? And for the first time in a few years we were actually home for New Year's Eve so we celebrated with friends. Unfortunately, the close of 2011 left me with several UFOs on my plate and I haven't sewed a stitch in the past two weeks but I'm choosing to look at the bright side - that's just a few more projects that I'm going to complete in 2012. Hope you all had wonderful holidays and a glorious new year!