Tuesday, May 31, 2011

Map of the States Blocks

I'm back and already sewing again. Truth be told I did a little sewing on my trip but more about that later. I have two more glorious weeks off of work and my plan is to get as much sewing done as possible. I have a To Do Wish List a mile long, but my first order of business was to get my May blocks done for the Sewn Together Bee. Flaun was a little behind in sending out her fabric this month (which was a blessing in disguise) so it was waiting for me when I arrived home yesterday. The list of everything I need and want to attack in the next two weeks is pretty daunting so it was incredibly easy to just get to work on these blocks rather than dive into the pile of who-knows-what on my *ahem* dining room floor.

IMG_5134
Close-up of one of the blocks with a little (oops!) freezer paper still waiting to get picked off.

Flaun sent each of us a pile of her scraps and asked for two Map of the States blocks using the Oh Fransson! tutorial found here.

IMG_5130

The scraps she sent me were full of shades of blue with a little orange thrown in for good measure (a color combo I love) and they were really fun and easy to make. Thanks to her I have discovered a new love for freezer paper. Seriously why didn't I know how useful it was before? Did you have any idea that you could iron it on to fabric? It sticks and then is easily removed without harming the fabric. Awesome little tool I say!

IMG_5133

These blocks are a great way to not only showcase fabrics but also bust your stash of scraps, which I need to do myself. The only snafu... I did run out of the white fabric that Flaun sent along for the sashing but I had some Kona Snow in my stash so I was able to remedy that easily.

IMG_5119

TIPS for Map of the State Blocks:
1) Make sure your scraps are big enough to allow for the 1/4" seam allowance above and beyond the "template" size.

2) Trim the 1/4" allowance truthfully (this can be a little tedious) using your ruler and rotary cutter. This will help you immensely when the sewing begins.

3) Keep track of the top and number of each row of scraps by either leaving on one of the freezer paper "templates", marking with a disappearing pen (or chalk) or simply using straight pins.

4) (This is where my lack of math skills really shines!) Remember to give yourself a 1/2" gap between pieces when ironing on two or more "templates" to a piece of fabric so each piece gets it's proper 1/4" allowance. You would think this goes without saying, right? Nope. I'm a blonde at heart and made that mistake so if Flaun is looking carefully she will notice a couple scraps with slightly less than the desired 1/4" seam allowance.

I hope Flaun is pleased with the results. I can't wait to see her finished quilt.

Monday, May 30, 2011

SMS Giveaway Day Winner

I'm baaack! Did you miss me? I'm refreshed, recharged and the best thing is I still have two weeks off before I go back to work. I usually try to respond to as many comments as I can but in this case I just couldn't but I truly thank each an everyone of you out there who commented. Now what you've all been waiting for... The Winner... Drumroll please...


Congratulations Skooks!

Skooks said...

WOW! That Heather Bailey would definitely be used in some capacity to jazz up my sewing room. As for the rest, I'm thinking bags, purses . . . man. The possibilities are endless!


I will be contacting you shortly and sending your goodies out to you.

I want to thank everyone who entered my SMS Giveaway. I am overwhelmed by the number of comments! And according to Google Reader several of you liked it enough around here to come back for more. Welcome to all my new followers things will get up and running back to normal in the next few days.

Sunday, May 22, 2011

Sew Mama Sew Giveaway Day

Aloha from Kaua'i! If you found my blog through Sew Mama Sew's Giveaway Day, Welcome! If you like it here I hope you stick around. First I have a quick order of business before I get on to the fun. We're looking for a few good Quilters to join us in the do. Good Stitches Bee. For those of you who don't know, do. Good Stitches is an amazing charity bee on Flickr. There are now several circles running. Each circle benefits a different charity making quilts for children in need. I have been hosting the Hope Circle which benefits Threading Hope, a charity that gives quilts to kids all over the world. Check out our Flickr group for more details. And if you're interested in becoming a Quilter for the Hope Circle email me directly.

Now for what you've all been waiting for... It's Sew Mama Sew's Giveaway Day and although I might be recharging my batteries on the beach with a Mai Tai I didn't want to miss out on all the fun. During my retail therapy spree last week I picked up some fabrics that I thought might be good stash builders and I bought enough to share! I thought these fabrics would make particularly cute bindings but if you're the lucky winner you can do anything you want with them. And who doesn't want some new fabric to add to their stash?

Sew Mama Sew Giveaway Day

Included in the giveaway is a half yard of each fabric: Pop Garden Zag Stripe in Yellow, Sugar & Spice Stripe in Red/Turquoise, Sweet Nothings Diamonds in Green, Ta Dot in Sunny Yellow, Nicey Jane Slim Dandy Stripes in Pink, 20 Sharps, a spool of 100% White Cotton thread and 5 machine quilting needles. That's 2.5 yards of fabric and some essentials for good measure.

It's easy to enter. All you need to do is leave me a comment and tell me what you think you might do with all the loot. That's it. Easy, right? One entry per person. International entries welcome. If you're a no reply blogger please remember to leave me a way to contact you. The giveaway ends at 11:59 PM, Sunday, May 29th. I'll let Random Number Generator make his pick and announce the winner when I get home on Monday, May 30th. Good luck and thanks for stopping by!

Friday, May 20, 2011

A New Winner

First things first. Unfortunately B' never responded to me so I had to pick a new winner of the Daisy Janie Shades of Grey fat quarter set. Mr. Random Number Generator picked lucky number...


Miki Willa said...
Happy Birthday! Congratulations on your 100 followers. This weekend I am watching my granddaughter and having dinner at my daughter's house on Mother's Day.
Congratulations Miki! I will be contacting you shortly to get your your prize.

It's going to be a happy day, right? Work has been a bit of a struggle lately and while I should be celebrating because I am wrapping out on the project today, I'm feeling a bit conflicted because I'm leaving the project in limbo and I hate leaving things unfinished. I am already 6 weeks past my contract end date and I can't stay any longer because I've committed to another project but it's tough to leave nonetheless. So how do I cope? Retail therapy of course! First I did a little stash building by adding some Shades of Grey to my collection.

IMG_5011

Then I happened to see that there was a Red Letter Day fat quarter set lurking around Etsy. I missed out on this line before so I jumped on the chance to scoop some up!

IMG_5013

I ran out to my LQS to pickup some fabrics for do. Good Stitches bee blocks. Robyn wants "true" green and white blocks for May. Green is my favorite color but ironically, looking through my stash I realized that much of the green I have tends to shy away from the green apple green that Robyn requested. So I just had to pick some up. Luckily the Riley Blake Christmas line just hit the shelves of Sew Modern so I picked up some Candy Dots and Christmas Candy.

IMG_5041

And Natalie got a jump on her June block and requested the gorgeous color combo of chartreuse and raspberry. And I spied some of Patricia Bravo's Dreaming in French line that I thought would be perfect. Then I threw in a little Tina Givens too. Delicious!

IMG_5044

Well my lovelies, it's not all stress and angst. I'm actually going to be taking a little bloggy break because I'm escaping the rat race and heading to Kauai for the next week. Yes, you can all hate me. I understand. And although I will be lounging on a beach, sipping Mai Tais, I'm also pulling a little stash builder package for Sew Mama Sew's Giveaway Day! Stop by on Monday to join in the fun! Aloha dolls! I'll be back soon!

Thursday, May 19, 2011

Curved Seams for Kristan

IMG_5037

I got waaay behind on my March block for the Sewn Together Bee. The saving grace was that Kristan mentioned that she wasn't in a rush for her blocks. Still I am sorry it took me so long to get the block back to her.

IMG_5035

This block was really out of my comfort zone. It challenged me and really stretched my skills. The great thing about this block was I got to try a technique that I had never tried before - curves seams.

IMG_5036

Kristan started by giving us some amazing fabrics to play with and a link to a video tutorial on the curved seams technique. I really loved the silver raw silk she threw in the mix and I started with that as my center. It reminded me of water so I thought of it as a river with the cotton prints acting as the banks radiating out. I would have stopped there but I then decided to add two "bridges" running perpendicular through the block. I don't know that I ever would have tried this technique if not for this block and I am so glad I did!

IMG_5038

TIPS FOR CURVED SEAMS:
1) When you're sewing the seams together it all feels a little counterintuitive but in the end it works. Going slowly helps.

2) It helped me to consider the seam as I would any 1/4" straight seam. Keeping everything lined up that way, stopping often and traveling slowly worked (rather than trying to follow the curve).

3) And I cannot stress enough the importance of a steaming hot iron! The iron was my friend on this one. Follow the directions in the tutorial and press the seams to one side. This works wonders on the curved seams.

4) After you've pressed the seams to one side flip the block over and iron the hell out of the front side of the block. I noticed tiny little folds or puckers occasionally when I would flip a seam (they usually popped up towards the end of the seams) BUT I was able to iron most of them out successfully.

5) Lastly, I found that I would end up with an excess of one strip of fabric toward the end of each seam so this technique does create some waste and don't expect two strips of the same length to end up that way. Take this into consideration when determining your block size. Go overboard and cut the block down or you may end up with a block that is smaller then you anticipated.

If any of you are inspired to try out this technique I would love to see your results. Let me know!

Wednesday, May 18, 2011

Nancy's Quilt is Finished

IMG_5023

Look what I just pulled out of the wash...

IMG_5014

My first commission is complete. Isn't it delicious? I really had such a fun time making this quilt for Nancy. Her brother recently welcomed a beautiful little boy into the world and this is her gift to her new little nephew. And I'm warning you now, I went a little overboard on the pictures.

IMG_5017

The original plan for the back was plain Robin's Egg Kona but I was just a tad shy on the yardage so I decided to add large squares of each of the fabrics from the stars on the front to help extend the width of the Kona solid. And I'm really glad I did. I think it added a lot to the back and showcases all the fabrics really well.

IMG_5022

I want to thank everyone who gave their input on both the layout and the quilting of this quilt. I loved all of the feedback. In the end Nancy won the Great Layout Debate (the quilt is for her after all) so the Central Park Zoo squares run diagonal through the middle and the subsequent rows are more orderly. As for the quilting, which sparked a little debate, I went with Natalie full force on this one. I favored Option #3 and then not only echo quilted around each star but I also echoed each long seam on either side.

IMG_5019

IMG_5020

I really love the patterns the quilting created. And I think on the next wonky star quilt (because I am sure there is another in my future) I may play more with echoing the stars both on the inside and out.

IMG_5024

I think the binding may be my favorite part of the quilt, though. I think the orange dots provide the perfect amount of contrast and color to the quilt. I really am dying to run back to my LQS to pick up some more yardage for my stash. I think it makes a terrific binding.

IMG_5033

IMG_5034

Alas, I think completing this quilt brings my Wonky Star Madness to an (temporary) end. I hope Nancy is pleased with the final outcome and this quilt provides her nephew with years of warmth and comfort.

Tuesday, May 17, 2011

MMM Spring Package Received

P1040046

I have been seriously remiss in sharing my amazing loot from the MMM Swap. A while back I took pictures with my little point and shoot camera and then I couldn't find the USB cord so the pictures sat in limbo. Then, this morning I discovered that my DSLR camera uses the same kind of memory card so I just swapped out the cards to download the pictures to my computer. I'll be catching up with those pictures this week but I'm starting by showcasing the amazing Mary. She was my super secret partner and she created an amazing package for me.

P1040053

I had been wanting a sewing machine cover and she created this gorgeous one for me combining my love of circles and linen. The color choices she made were perfect too!

P1040049

Part of the MMM Swap is including yummy, yummy fabric and there is no secret that I am in love with the Oliver + S City Weekend line. I love the colors, the patterns and the feel of this fabric. Seriously, it's soooo soft. I am hoarding this entire line and thanks to Mary I have more to add to my stash.

P1040048

Rounding out the package she included some yummy Sees Chocolates (that didn't last the night!), a new seam ripper (that I LOVE) and some pins (which always come in handy). What an excellent package. Thank you so much Mary! I love everything! I promised myself to pull back on the Bee and Swap commitments but the Make Mine Modern Swap is my favorite so I'm joining in the fun and participating in the Summer round just starting up.

Monday, May 16, 2011

Bloggers Quilt Festival Spring 2011

Amy's Creative Side

I remember last Spring when the Bloggers Quilt Festival rolled around. I was in awe of all of the amazing quilters I discovered and the beautiful quilts that they shared. I so wanted to be a part of the fun, but didn't have much to show at that time. So I waited for the day when I could participate. Then last Fall I felt confident enough to join in the fun and share the quilt I made for Ruthie and Mike. I am very excited to be joining in the fun again. This time I want to share a quilt that many of you have seen in various stages on my blog but I haven't revealed the final product because I was waiting for the right time. Say hello to Marc's Quilt.

IMG_4976

When I started quilting last year one of the first things I did was try to seek out a VQB to join so I could start to work on my block skills and meet other quilters. I was rather impatient and was having trouble finding a bee that had room so I took it upon myself, along with two fellow quilters in a similar predicament, to become a Bee Mama and start the Sewn Together Bee on Flickr. Originally I had a month in the fall, close to when my wedding date was supposed to be but when one of our other members was struggling to get ready for her month I volunteered to trade with her.

IMG_4997

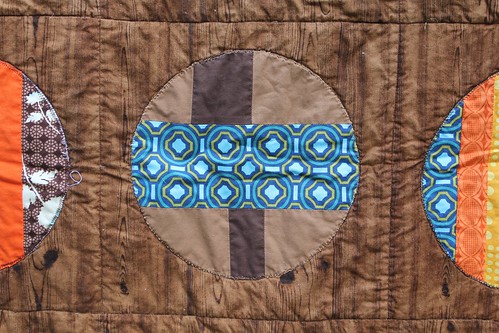
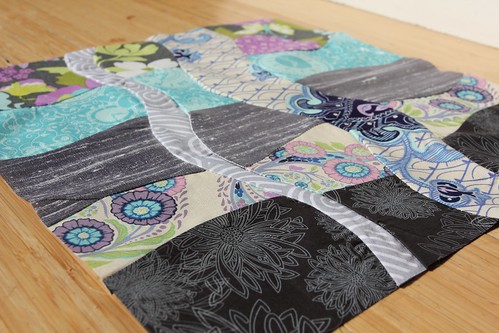
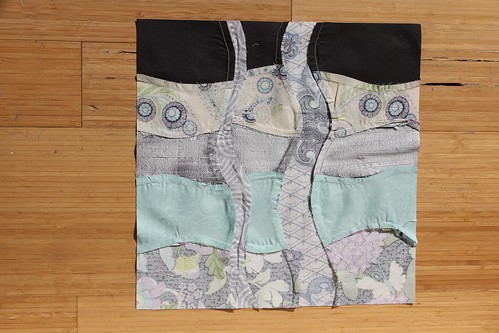
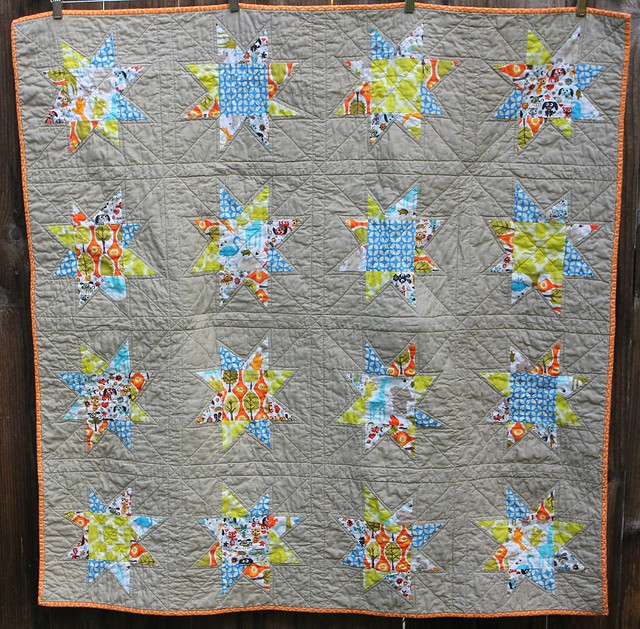
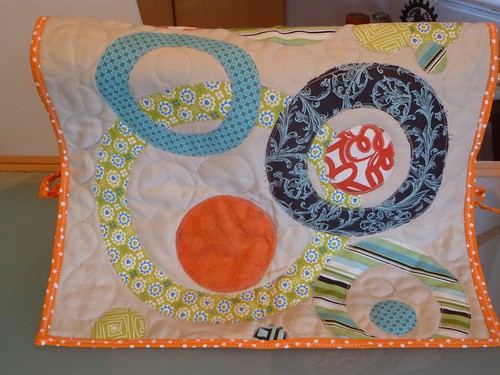
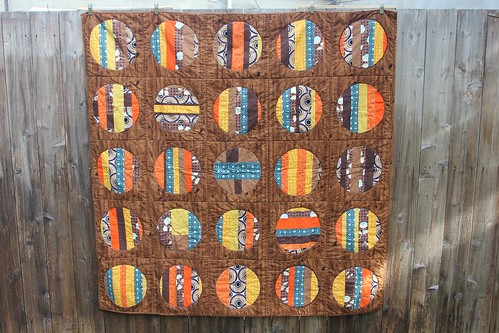
My (now) sweet and adorable husband was constantly complaining that I spent so much time making things for other people and I never made anything for him. That led me to decide to have my fellow quilters in the Sewn Together Bee help me to create something just for him. Now, my husband is very particular when it comes to design so I was sure to let him in on the process. I showed him a couple blocks that I though he might like and he picked the Circle Block over on the Block Party Blog. He also joined me on a run to a LQS to pick out some fabrics. I wanted it to be manly and something he really loved so I let him go crazy. And crazy he did.

IMG_5008

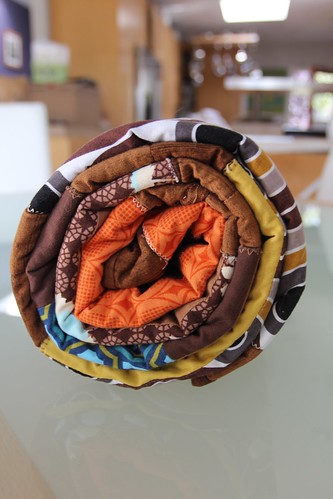
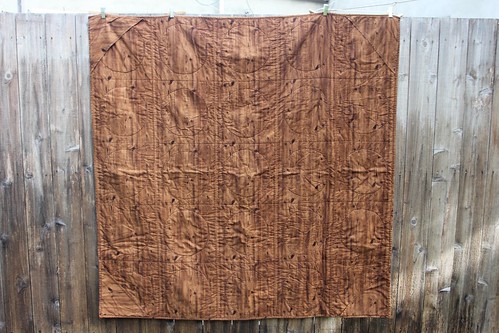
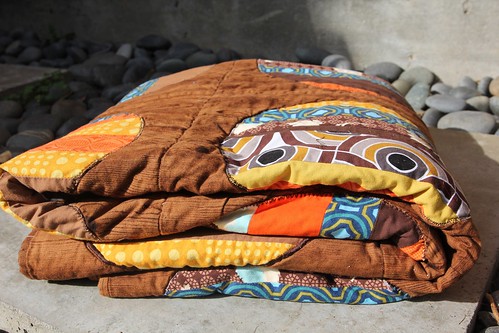
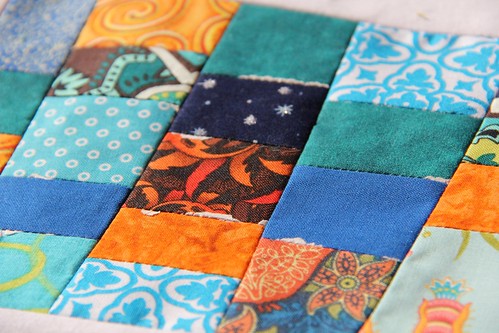
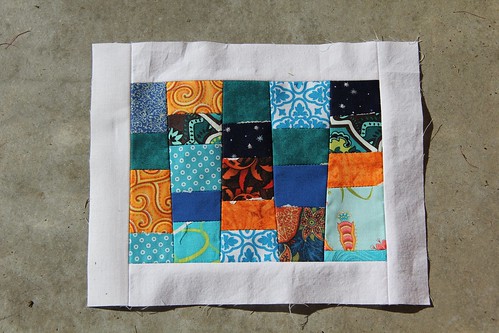
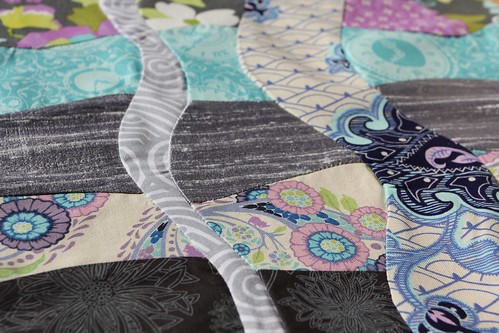
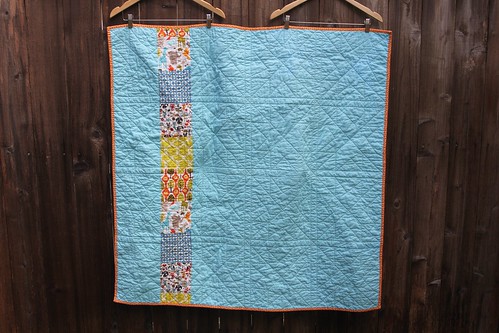
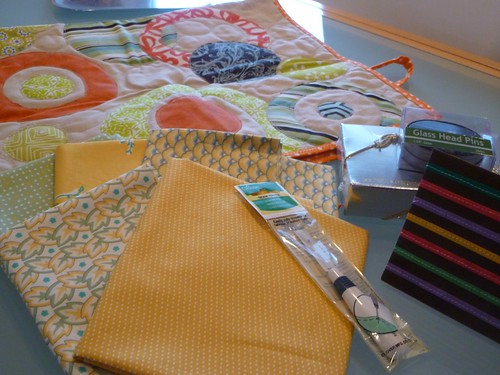
He immediately gravitated to the Moda wood grain fabric and I about died. I didn't know how I could use that as the basis and inspiration for an entire quilt. I have to admit that I thought it was U-G-L-Y. But he loved it - with a capital "L" so I started designing around the wood grain. I started pulling orange, yellow, blue and brown fabrics for the stripes. I wanted to keep the complementing fabrics earthy and masculine. I also pulled some Kona solids to break up the patterns. I sent out my packages to all the Bee participants with plenty of variety. My instructions to them were simple: Have fun with the stripes, I only asked that they run parallel or perpendicular to the wood grain (not at a diagonal). I asked for two 12.5" (unfinished) blocks each if possible. And I gave them a link to the Block Party Tutorial as a reference. In return I got some amazing blocks back.

IMG_4983

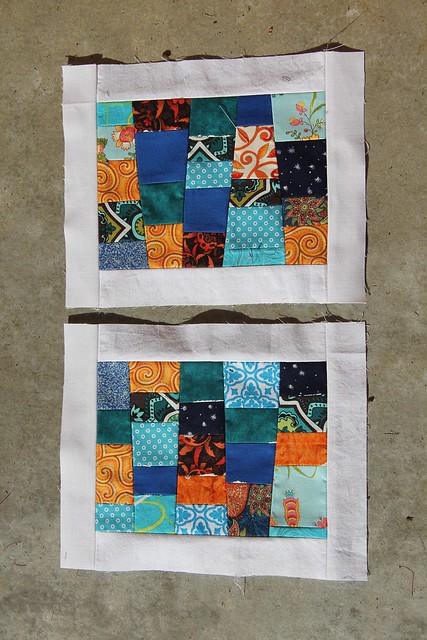
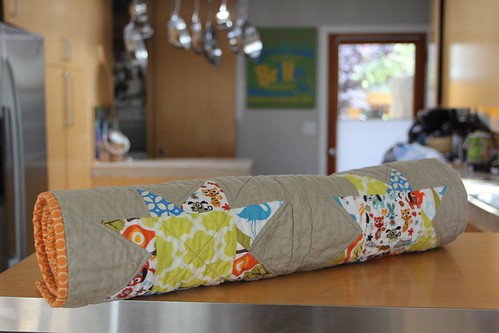
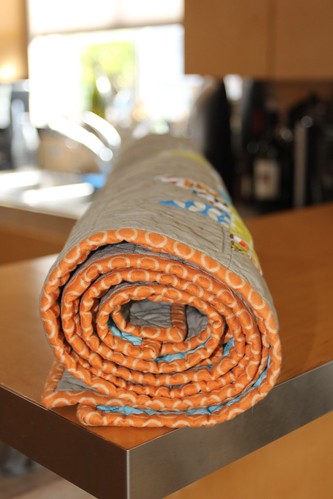
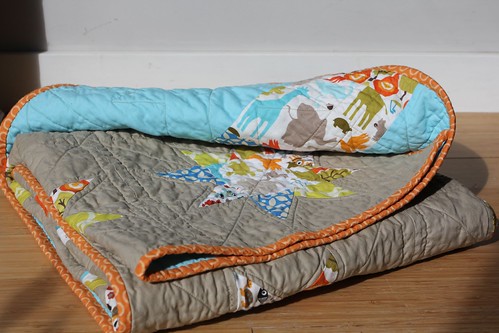
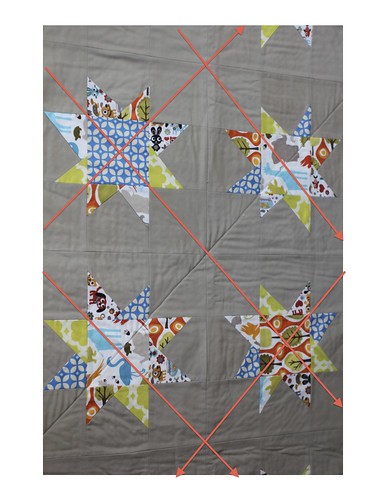
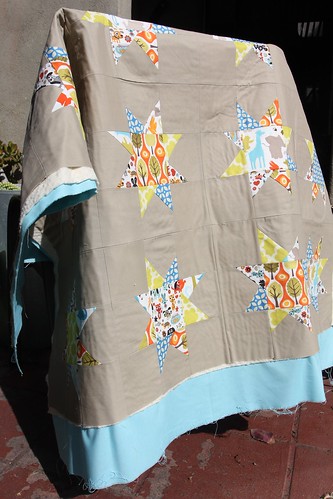
Once I had collected all of the blocks I started playing with a layout on my design wall. I had reserved making my own blocks until I had all the others back. I only got one block back that went perpendicular to the grain so I decided to make two more to compliment it and I put those three blocks on the diagonal in the center of the quilt. After that, the quilt came together easily. My husband wanted the wood grain fabric that he loved so much as the quilt back and the binding so one disappeared into the other.

IMG_4993

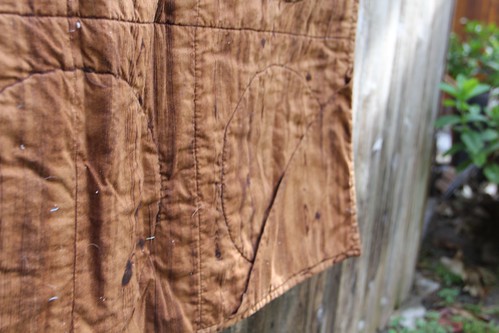
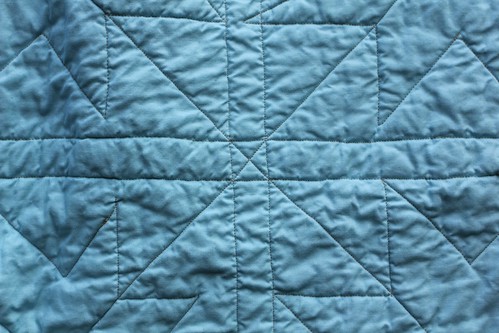
Since Marc loves clean, modern lines, I kept it simple while quilting. I stitched in the ditch along each seam and I traced each circle as well. This is going to be our beach blanket for all the concerts at the Santa Monica Pier so I also added special feature on the back: a pocket in each corner. The pockets are fastened with Velcro so we can store keys or whatnot in each or we can put a rock on sand in them to help the quilt from flying away if it's windy. I machine basted the pockets down in each corner and then sewed them in when I bound the quilt.

IMG_4989

IMG_4995

After working on Marc's Quilt for almost a year I have actually fallen in love with it, and not just because I was making it for someone I love. I have embraced the retro 70's look of the wood grain fabric. I love the blues, browns, oranges and yellows in the stripes. This quilt is one-of-a-kind and I think it's fun and whimsical in a very masculine way. And I love circles! Always have. Always will. It's also the largest quilt I have quilted to date. I no longer think this quilt is U-G-L-Y... I think it's awesome. And my husband thinks it's awesome and that's all that matters.

IMG_5001

Thanks to Amy for hosting the 2011 Spring Bloggers Quilt Festival. Thank you to my readers who offered their support and insight while I was making this quilt. Thank you to my husband who had the creative vision to inspire this quilt. But most of all thank you to every one of my fellow stitchers in the Sewn Together Bee who helped me make this quilt; April, Sorrel, Mandy, Anna, Flaun, Amy, Kim, Rick, Paula, Mary & Kristan - I love sewing with you all!

Thursday, May 12, 2011

Option #3 (With a Twist)

First of all I have a bit of housekeeping. B' was the winner of the Shades of Grey Fat Quarter set. Unfortunately she is a No Reply Blogger. I have tried to track her down through her blogger profile and own blog but haven't been able to find any way to contact her. B please leave a comment letting me know how to get in touch with you by the end of Thursday. If I don't hear from her I will pick another winner Friday morning. (*** EDITED - Because of the Blogger outage over the weekend I am extending her time to get back to me until Friday to be fair. ***)

That leads me into my second thought. There have been a whole lot of "No Reply" bloggers leaving comments lately. I try to respond to as many comments as possible so if you haven't heard anything from me you might be one of the No Reply Bloggers. I think that communication is one of the amazing things that the online community has to offer. That's why I try to respond to every comment. You never know when it's going to spark an interesting discussion or even lead to a friendship.

How do you fix it? Go to your Dashboard on your Blogger.com account page. Select "Edit Profile" and check the box that says "Show my email address" (and remember to save your changes). It's that simple.

No onto the WOW! I want to thank you all for the helpful input on how to quilt Nancy's Quilt. There was an overwhelming show of support for Option #3. Then my good friend, Natalie, of Threaded Mess, made an interesting suggestion. She thought about doing Option #3 and then also echo quilting around each of the stars...

IMG_4964

IMG_4965

I think she may be onto something, don't you? The only problem - I ran out of thread after my first star so a trip to the fabric store is in my future. Instead I got the binding prepped and ready to go.

IMG_4969

All this quilting talk did spark some interesting debate. I had several comments suggesting that my lack of quilting might create a shorter quilt life. I had never thought about it. Does more dense quilting add a longer life span to a quilt? It makes sense. What do you think?

Wednesday, May 11, 2011

A Little Help From My Friends

WIP Wednesday at Freshly Pieced

It's WIP Wednesday with the fabulous Lee over at Freshly Pieced and I need a little advice on my current WIP. You know, that's one of the reasons I love blogging. Yes, it's fun to be able to show off your triumphant finishes, but I personally get more out of sharing the process and the sometimes struggles. I love putting a WIP out there and getting input from my fellow crafters. I think that's part of what makes this online community so special. In an odd way it's helped us get back to the old days when people would gather together and create something as a group, wether it be raising a barn or making a quilt. It's given us a new, albeit modern, community.

IMG_4962

Regular readers have been seeing a whole lot of Nancy's Quilt lately. If you're new to my blog you can check out her progress here, here, here and here. She's basted, so here's where you come in. New and regular readers alike I'd love some input on how I should quilt her. I know I want to straight-line stitch her. I started the first line of stitching in fact. At first I was just going to stitch her diagonally, in one direction, through the center of the stars. I love straight line quilting (and it's not just because I'm a free motion chicken) and I have a tendency to take on a "less is more" approach to my quilting. And no, it's not because I'm lazy. I like the clean lines and the simplicity. But after I sewed my first line I started thinking if maybe I wasn't doing justice to my quilting with the "less is more" approach. At least with this quilt. So what do you think? How should I quilt her?

IMG_4963

Option #1 is to continue with my original plan and simply straight line stitch on the diagonal, in one direction through the center of the stars.

IMG_4963v2

Option #2 is to straight line stitch on the diagonal, in one direction through the center of each row.

IMG_4963v1

Option #3 is to straight line stitch on the diagonal, in both directions through the center of each star.

IMG_4963v4

Option #4 is to straight line stitch on the diagonal, in both directions through the center of each row.

IMG_4963v3

Alrighty friends, what do you think?

Tuesday, May 10, 2011

Progress on Nancy's Quilt

I'm not ready to give you my full review of spray basting quite yet. I'll reserve that until I've actually quilted and finished Nancy's Quilt. But I can tell you that so far I am loving it. The pros of spray basting seem to outweigh the cons so far.

IMG_4944

Nancy's Quilt is coming along. I have it basted and last night I was planning to start quilting it, but I was so exhausted when I got home from work last night that I could barely keep my eyes open. Instead I went straight to bed.

Fresh Poppy Design

I'm linking my progress up to Fabric Tuesdays over at Quilt Story. Why don't you join me?

Monday, May 9, 2011

Giveaway Winners

I hope that everyone had a wonderful weekend. Although I worked on Saturday I was able to get out and have a great dinner with friends that night and the hubs and I spent Sunday organizing the kitchen and trading in some wedding gifts for some new knives and other useful gadgets. I also got to try my hand at spray basting for the first time. More on that later. I know what everyone really wants to know... Who are the giveaway winners? Drumroll please...

The winner of the scraptastic Birthday Giveaway is...

Deb said... Congrats on your birthday - hope it was enjoyable. OH and to get those goodies with the Hope Valley and new fabric line, lucky you! My favorite thing for a birthday would be to go do lunch with my hubby. Birthday always falls around Thanksgiving, so it's usually celebrated at the same time..which is a little depressing. Enjoy your day!

And without further ado, the winner of the 100 Follower Shades of Grey Giveaway is...

B' said... so lovely fabrics!
and on a weekend I'm to visit my grandparents, of course bake something to them, and then to do a little shopping and finish sewing a dress for myself.

Thank you to everyone who entered! I appreciated all the comments and while I have been able to respond to most of you I am still catching up on responding to a last few comments. Happy Monday everyone!