Tuesday, December 18, 2012

Scarves for Men

So, this weekend I made a scarf. And I was really digging it. And I guess I still am, it's got me second guessing my aesthetic a little bit. I was at a fabric store this weekend and found this great, relatively inexpensive poly / rayon blend. It's think, feels like wool but much softer and I thought it would be great for warm winter scarves. So I bought it in charcoal and a sage-y green. 


IMG_2814


I measured out one of my husband's scarves and cut accordingly, then I pieced in some shot cotton, a couple masculine prints (can you see the new Architextures line in there. Yummy!) and some linen. I backed it with a light AMH voile, thinking the might feel nice on the neck. Super quick and simple. 

IMG_2815

Then, I gave it to my husband as a gift, since we're heading to Alaska for a week on Sunday. He's unsure if it's his style. He wants to think about it. And don't worry, I'm not offended in the least. I actually appreciate when people give me their honest opinion. I think people are so scared of offending others that they're rarely honest. I know I fall into that category. But for me, I know everyone has their own sense of style and taste. Doesn't make it bad, just not the right thing for him. Oh well, it may be going up for sale on Etsy. What do you think?

Monday, December 17, 2012

Bee Blocks Almost Done

I didn't get nearly as much as I wanted to get done this weekend, but I'm okay with that. Saturday I only left the house once, and spent the rest of the day curled up on the couch, with a fire and the dog catching up on my TV shows and doing some hand sewing. There was so much sewing I actually had to do, but I opted to laze on the couch instead. Yesterday I had a holiday brunch with my friends in the early part of the day any by the time I got home in the mid afternoon I resolved not to leave the house again. This time I did get some face time with Hepburn to catch up on some bee blocks to get me through to the end of the year. 


IMG_2817


I've got next week off work so we're taking a little trip (to Alaska! I'm so excited!) so my sewing time between now and the New Year will be virtually nonexistent. I was behind on some blocks for November so I wanted to power through and get them off my plate. For the Hope Circle, Janet asked for some Garden Lattice blocks in Tangerine using this tutorial

IMG_2819

IMG_2818

Then, Flaun asked us to paper piece some amazing solid blocks in the Sewn Together Bee. We used the pattern "It's a Stretch" found in the book "Modern Blocks". I am so excited about these. I absolutely cannot wait to see this quilt completed. It is going to be absolutely amazing. 


IMG_2820


IMG_2821


IMG_2822


My last block ever for the Sew Fun Bee was a low volume, traditional block for Dolores. She wanted each of us to use modern, low volume fabrics but do a different traditional block. I picked the Quatrefoil block because I love it so much. I really need to make a low volume quilt for myself someday soon.


IMG_2816

I'm really going to miss sewing with that group, but at least that's one bee off my plate. I still have two outstanding bee obligations to finish out the year, one for November for the Bee a Lone Star(burst) and one for the December Hope Circle. Speaking of the Hope Circle, we're looking for two Stitchers to join our circle in the new year. If you're interested in joining us to make charity quilts for Threading Hope with do. Good Stitches, please contact me. We'd love to have you!

Wednesday, December 12, 2012

Spray Basting Tutorial

IMG_2791

Recently I basted my Broken Triangles quilt and it's not secret that I favor spray basting over pin basting. And I've had a couple friends ask me in the past what method I use when I spray baste. I don't know if my method is pretty standard or not, but this is how I do it. Ideally I would prefer to spray baste outside, unfortunately, if I'm basting at home I don't have an outdoor slab of concrete flat, large or clean enough to baste a quilt so I have to do it indoors. I usually clear out my dining room since it's pretty open, which means better ventilation. I also open all the windows to keep the air circulating. Spray basting isn't horribly messy, but you're dealing with aerosol glue in a can, so you need to protect your workspace. I wouldn't recommend basting too close to furniture you want to keep. 


IMG_2792

First, I lay my quilt back (right side down, of course) flat and use masking tape to adhere it to the floor so it stays as flat and taught as possible. I use 1.5" or 2" wide masking tape (the wider the better) and I tape the quilt back down with newspaper to protect my hardwood floors. I leave a small gap between the quilt top and the newspaper so the tape can also adhere to the floor, securing the quilt top. The first time I spray basted in the house I didn't use newspaper and it took me about an hour and a lot of elbow grease to get the dried glue off my floors. I learned that lesson quickly.


IMG_2794

Then, I lay out the batting over the quilt top, smoothing out any creases. Once I am happy with the positioning I fold up one short side about 12" or so and I spray the basting glue onto the quilt top all he way across and then I fold the batting back down, smoothing out all the creases and bumps. 

IMG_2793

After I've secured that end of the batting to the quilt back I move to the opposite side of the batting and I roll the batting all the way back to the other end, stopping where I can feel the adhesive on the other end doing it's job. I will be on my hands and knees (no shoes but with clean feet!) In the center of the batting that's been secured down and continue my way down through the middle of the quilt as I tack the rest.


IMG_2796


From here I start spraying the adhesive about 12" wide from one side of the quilt to the other. Depending on the brand of spray baste you're using will dictate how densely you apply the glue. I usually spray from one side to the other in a zig-zag motion, and then sometimes add one more spray, directly across in the opposite direction for good measure. (I hope that makes sense!) Then roll out the batting, to around the point where you think the glue ends and smooth out any bubbles and creases. Repeat this until the entire batting is tacked down to the quilt back. 


IMG_2795

After the batting and the quilt back are adhered together I repeat the entire process to secure my quilt top to the batting. Once it's all sandwiched, I remove the tape and it's ready to quilt. I am sure there are lots of other ways to spray baste out there, this is just the method I've developed that works for me. Do you do it differently? What works for you? 

Tuesday, December 11, 2012

Drooling Over City Center

My husband is in Panama this week and I am so jealous. While I'm stuck here working, he's having cervesas on the beach with the boys. Sigh. But since he's not home I am going to try and schedule a serious date with Hepburn, my faithful sewing machine. Since it's also holiday time, my free time at home is actually pretty limited, unfortunately. Last night I got a surprise visit with my aunt, who lives in New York. She randomly texted me that she happened to be in town for a meeting so I met her for dinner. She's one of my best friends so we closed down the restaurant, but I managed to get a little hand stitching done in bed when I got home.

photo

Tonight, I plan on getting in a few hours with Hepburn (named for my favorites Kate & Audrey), if I get out of the office at a decent hour. I need to power through some bee blocks so I can free up my sewing time on Saturday for some fun projects, because I have a big old pile of fabric *screaming* my name...

IMG_2784

Can I just tell you how absolutely in love I am with Jay McCarroll's new line, City Center? Seriously, there are two lines that were recently released that sent me over the moon and this is one of them. I love Jay, and I have always been a fan of his fabric because I think he has a very graphic and unique point of view but this is, hands down, my favorite line of his. And my husband loves it too! In fact, he picked out the yellow fabric and asked me to make a dog bed for our living room with it. He wanted something fun and funky and something we wouldn't mind seeing every day. Then I picked up some significant yardage of my two favorite prints from the line with the intention of making some dresses for myself. My husband wouldn't let me buy any more when we were at Sew Modern, but he's out of town and they just got Architextures line in so I think I'm going to pick up more City Center while I'm there too!

Friday, December 7, 2012

Labels

Guess what? I finally got some proper labels. And they're perfect. Small and simple, just the way I like it. I do need to get into the habit of putting "proper" labels on my quilts as well. But it's all about baby steps.


IMG_2761

At first I went the Spoonflower route and had some fabric labels printed. Then I used double sided fusible web to stick them on, but they just weren't right. 

IMG_6688

And I saw these labels on someone else's blog (I can't remember which) and I decided to check them out on Etsy. They're not super expensive and the come rather quickly. Although, mine did get lost in the mail and returned to sender initially. But as soon as we figured that out, I got them back really quickly.

IMG_2777

I opted for a light gray background and darker gray lettering. Gray is, after all, my neutral of choice and I thought they would be more unassuming and go with everything. And since I make a lot of garments as well as quilts I thought these would be the perfect size for any project.

IMG_2762

I've been having fun sewing them into my latest creations. And I have a ton of them, so I am sure they'll be popping up all over my projects from now until eternity!

IMG_2773

If you're looking for labels like these you can find them here.

Wednesday, December 5, 2012

She Made Swap

IMG_2769

After I had made the decision to cut back on swaps and bees, I had already committed to a few. One of those, the Modern She Made Swap, is wrapping up right now, so I can check one off the list. I jumped on board the Modern She Made Swap back in September when I thought that I would actually be in town for the majority of the Fall. Thankfully, I did find enough time to participate and make a (hopefully) thoughtful package for my partner. I just didn't have as much time to post pictures of my progress and comment on others photos as I would have liked. 


IMG_2774 

IMG_2776

I must admit that I was a little confounded at first when I got my partner. She was way wide open and seemed to be happy with anything and ultimately I just wanted to please her at the end of the day. So I did some stalking and carefully watched how she would respond to pictures other people posted in the swap and I finally decided on a (mostly) solid Mini Quilt for her. I knew she loves solids and the theme of this swap was "Triangles" so I made her a herringbone mini, that ultimately was hard for me to part with because I loved it for myself.

IMG_2771

I also made her a matching little fabric basket, that you've all seen before. And I included some batik fat quarters to go along with it, since she admitted to having a *secret* adoration for batiks. I haven't heard back yet, which worries me because she should have her package by now. I hope she loves it. 


IMG_2780

IMG_2783

Then, I received a fabulous mini quilt from Heidi. I just adore it. And I can't wait to hang it in my studio. She captured my love of modern, clean lines, hand stitching and low volume fabrics perfectly. She says it was a stretch for her, but I think it came to her naturally. 

IMG_2781

She included a matching pin cushion and some Kate Spain (favorite) fabric scraps for me in the package as well. Lucky me! I love good mail days like this!

Tuesday, December 4, 2012

Marathon Quilt: Month Seven

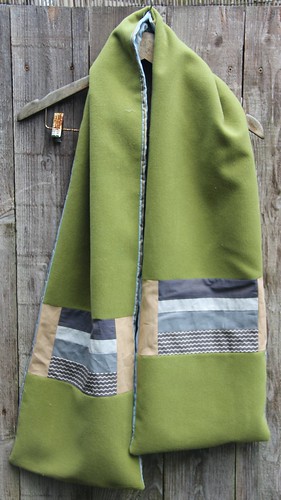
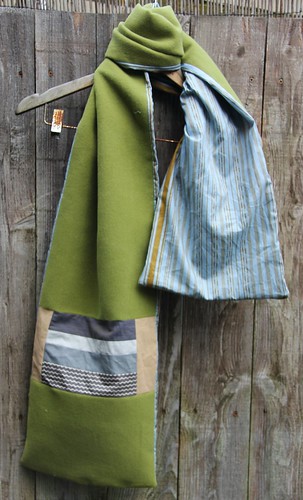
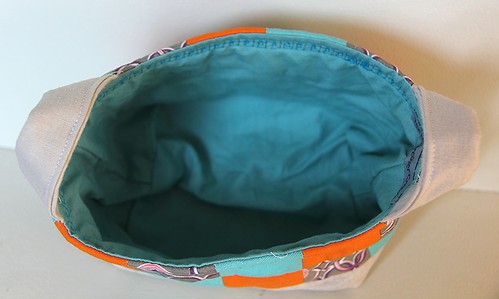
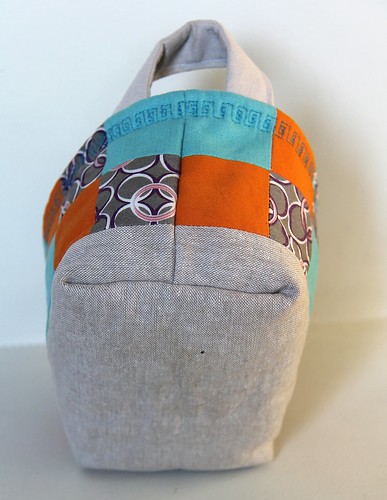
Thank you so much for the support I've been getting from a lot of you over the past few days. It really means a lot to me. I've always used my sewing as not only a way to express myself artistically, but also as therapy to help me work through things in my personal and professional life. I've often explained my craft to people who don't get it that it's the one outlet I've found in my life that allows me to completely unplug from the rest of the world. When I'm in front of my machine I have to concentrate on the task at hand or else I start to make mistakes. It forces me to focus on one thing, not many things at the same time like I have to do in the rest of my life. 


Untitled

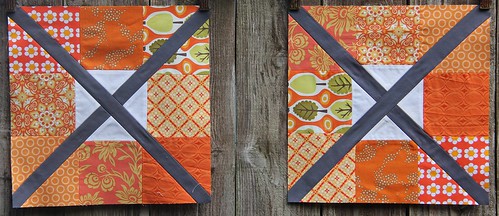
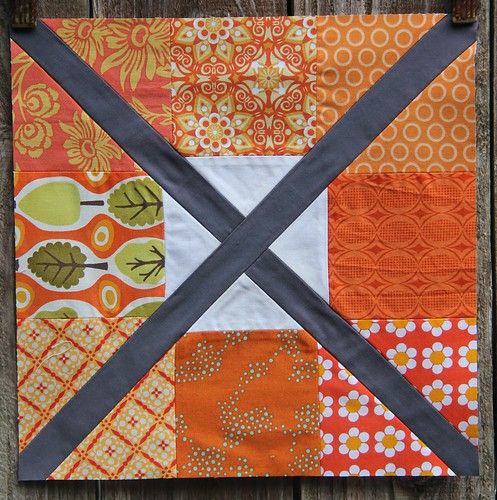
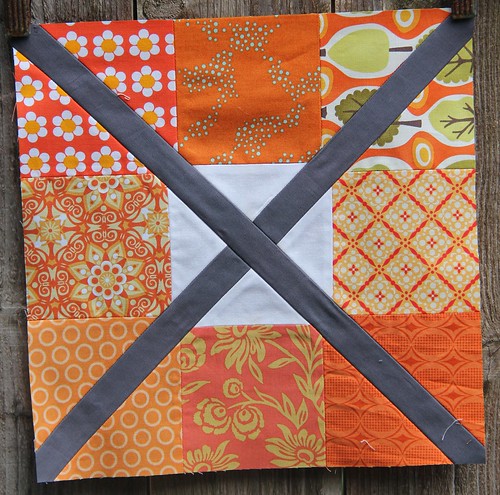
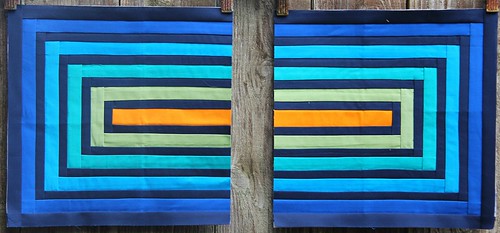
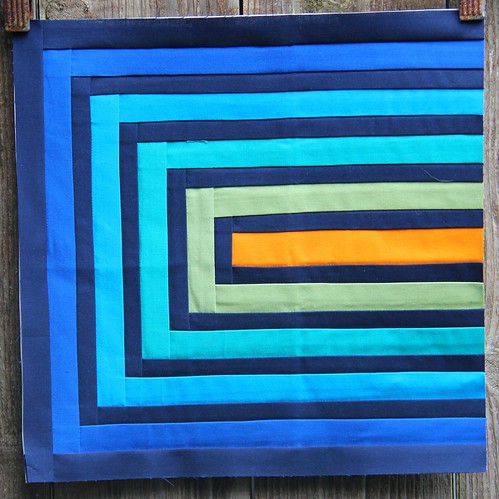
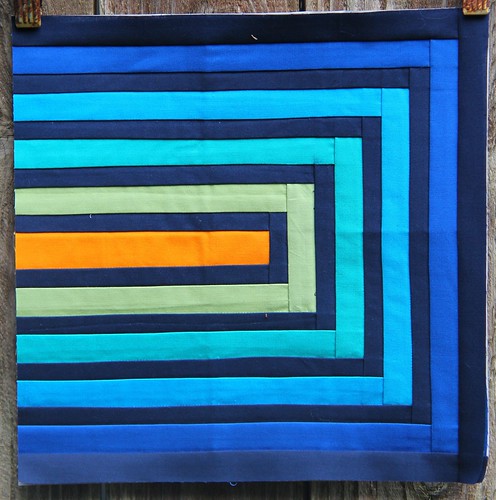
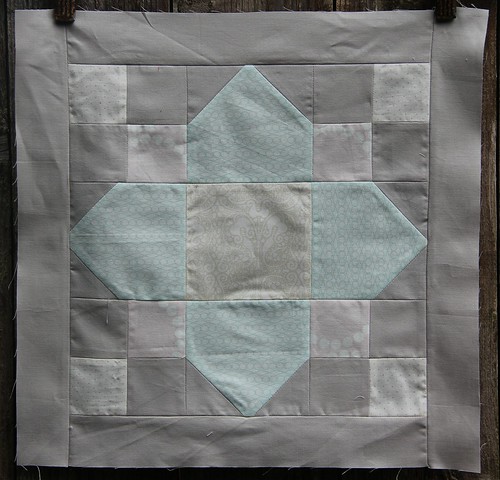
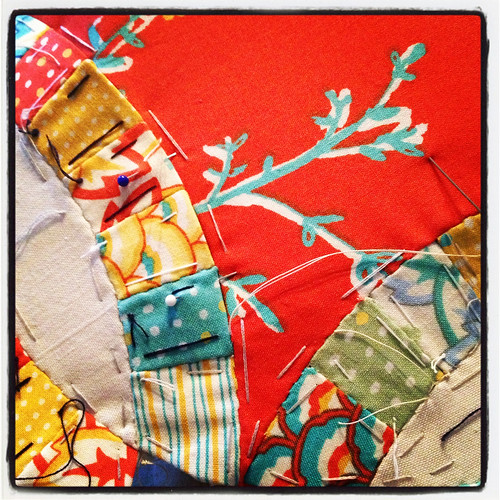
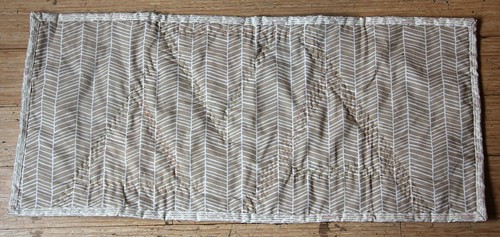
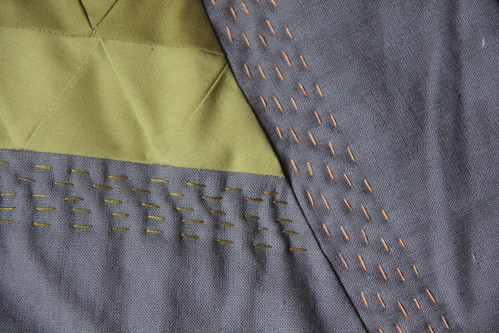
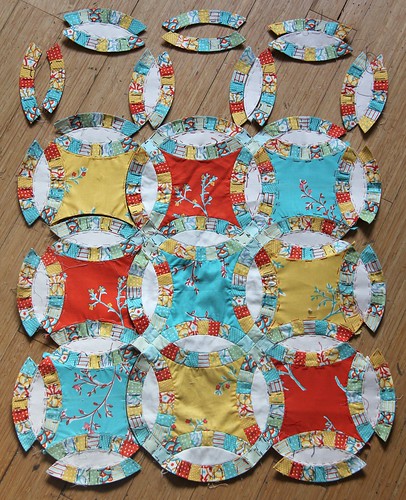
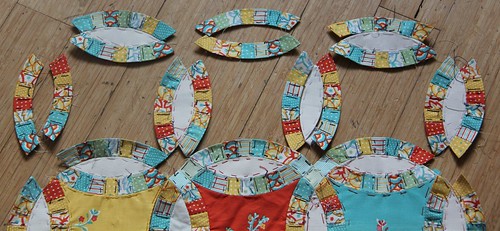
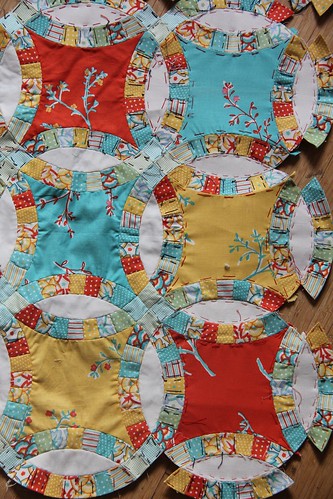
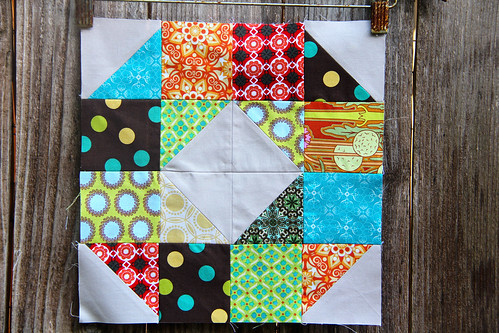
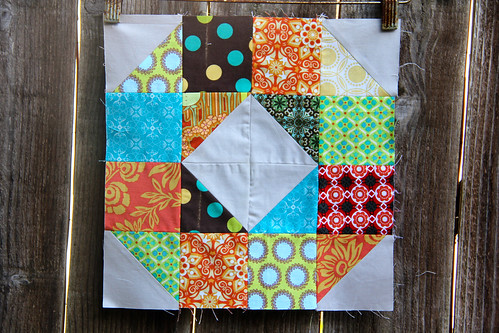
This weekend my husband and I went up to San Francisco for a couple nights for a Holiday work dinner for him. Our flight was delayed getting up there so I had several hours in the airport to work on my marathon quilt. I didn't post a six month update, and that's because I really didn't have anything to show for it. I made little to no progress on the quilt during October, but I was able to make quite a bit of progress this month. Now, seven months into the quilt, I have nearly 12 blocks completed. And I pieced six of the completed blocks together, which was a little challenge. Woo Hoo!


Untitled

I often get asked how big I'm making this quilt. When I started I had visions of a King Sized monster for our bed, but now my answer has changed. And it's simple. I don't know. I don't know how big this quilt wil end up being, all I know is that when it's the right size, I'll stop. I realize now, having it on our bed really won't be practical. Our dog loves to get up on the bed with his messy paws and I don't want it ruined. But I do want it used because, ultimately that's the main purpose of making a quilt. 


Untitled

So, I'm seven months in, with no end in sight. But that's okay. I'm in no rush, and I'm still not sick of it. I still find myself with a deep desire to work on it all the time, even though it often gets marginalized because there are so many "Have To" projects on my list. Hopefully, the husband and I will be taking another road trip over the holidays, so that means more time for hand sewing. Yippee!

Friday, November 30, 2012

Focusing on Me

I have hardly had any time for sewing lately and even less time for blogging, which makes me sad. I didn't even have time to blog about the amazing time I had at the LAMQG Retreat, which happened over two weeks ago. Ugh. Life has just been incredibly overwhelming this Fall. And I miss blogging. But I'm making some changes to hopefully free up a little bit of time to focus more on sewing for *me*, when I have the time to sew. 


IMG_2778

When I was on the retreat (which was so absolutely amazing and fulfilled my soul) I started working on a project that has been trapped inside my little head for about a year and a half now. I just resolved to focus on me and my art and finally start to let it out. 


IMG_2779

I think I need to be a little selfish for a while. Not completely selfish, but I just need to allow myself to be a little more focused on my own art. Especially since things at work always seem to be consistently dramatic and stressful and that won't change unless I choose a new career path, so a little bit of internal focus at home is okay. So, I'm sorry I haven't been around as much as I would like to be, but I do appreciate you all hanging in there with me. The juices are flowing so I just need to start channeling them.

Wednesday, November 28, 2012

Happy Little Pouch Hop


Good Morning everyone! First of all I just wanted to thank Elaine and Emily for inviting me to participate in the Happy Little Pouch Blog Hop. Don't you just love a little bag? I'm not really a purse person in my everyday life, but I adore little pouches and bags of all sizes, especially for storage and travel purposes. And I travel a lot. Recently I decided to test out one of Ayumi's patterns for her little fabric basket and I was instantly addicted. These baskets make a great addition to any swap gift you might be cooking up.

IMG_2785

Her pattern is super easy to follow and the basket comes together very quickly. There are also a bunch of modifications you can make to personalize it and make it your own. I made another one of these for a friend (and I forgot to take pictures, ugh!) using Echino. I didn't want to cut up the print so I just cut two 9.5" x 3.5" strips instead of making the patchwork square strips.


 IMG_2788
IMG_2789

IMG_2790
  

Another way to easily personalize these baskets is by using a decorative stitch instead of an edge stitch around the top of the basket like I did here. 


IMG_2786


Just make sure you're lining is lying flat when you edge stitch our you could get a pucker like I did. (Boo!)


IMG_2787

Although Ayumi's pattern is for small baskets (perfect to hold a few fat quarters or your collection of buttons) it's easy to modify her pattern to make larger baskets. And these come together so quickly and easily that I think I'll be whipping out many, many more of them in the near future.

Want to see more Happy Little Pouches? Check out the rest of the Blog Hop Participants:


Monday 11/26: Emily from Mommy's Naptime and Elaine from Dashasel Sews
Tuesday, 11/27: Courtney from Mon Petit Lyons and Lucy from Charm About You
Wednesday, 11/28: Hollie from Undercover Crafter and Katie from Katie's Korner
Thursday, 11/29: Lindsay from Lindsay Sews and Michelle from I Like Orange
Friday, 11/30: Sara from Sew Sweetness, Cindy from Adventures of the Singing Quilter, and Jennifer from Ellison Lane Quilts

Monday, 12/3: Holly from Bijou Lovely and Heidi from Fabric Mutt
Tuedsay, 12/4: Elizabeth from Don't Call Me Bets and Emily from Mle BB
Wednesday, 12/5: Shruti from 13 Woodhouse Road and Liz from Dandelion Daydreams
Thursday, 12/6: Beth from Plum and June and Kaelin from The Plaid Scottie
Friday, 12/7: Emily from Mommy's Naptime and Elaine from Dashasel Sews

Thank you for stopping by! And please join us in the fun and share your pouchy makes in our Flickr group. The Flickr group is also where you can upload your pouchy makes, and at the end of each week we will have some great prizes to award!

Prizes have generously been donated by:


WhileBabyNaps


Monday, November 12, 2012

do. Good Stitches October Blocks

I am getting so excited. I can't wait for Thursday. This weekend is the annual LAMQG Retreat. I should have spent the time I had to sew this weekend prepping for the retreat, instead I caught up on the last of my tardy bee blocks. As of now, I am all caught up. I only have November blocks in the queue. Yippee!

IMG_2764


Robyn asked the Hope Circle to make two 12.5" unfinished Patchwork Wheel Blocks using this tutorial. She also selected an autumn palate for us to use. I struggled with this palate, I have to say. It's not that I didn't have autumnal fabrics in my stash, I do, granted not a lot, but I'm just not as comfortable with this palate, I suppose. 

IMG_2768


IMG_2767

I think I need to get more comfortable with it, though, because my husband loved these blocks and colors. He never usually comments on the blocks I make for bees but these struck him. I think I need need to work with these colors more often. 

IMG_2766

IMG_2765

I actually made 4 blocks since we had a member drop out of the circle and I didn't want Robyn to have to pick up the slack. Remember, if you want to do some good too. You can always sign up to join in a do. Good Stitches Circle. And Rachel is also hosting a celebration of do. Good Stitches and anyone can join in by stitching up a quilt for charity.