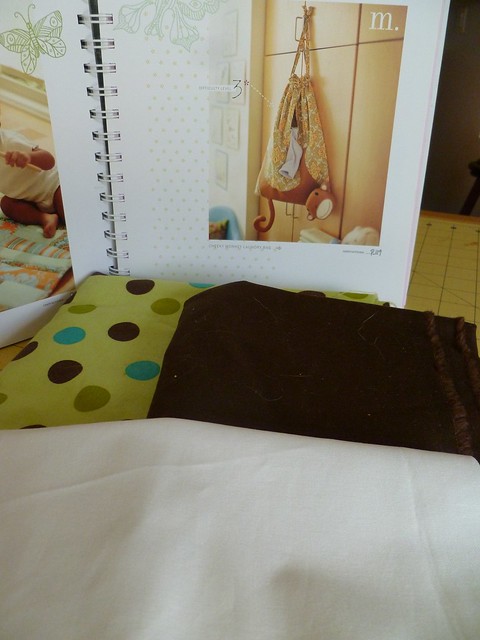
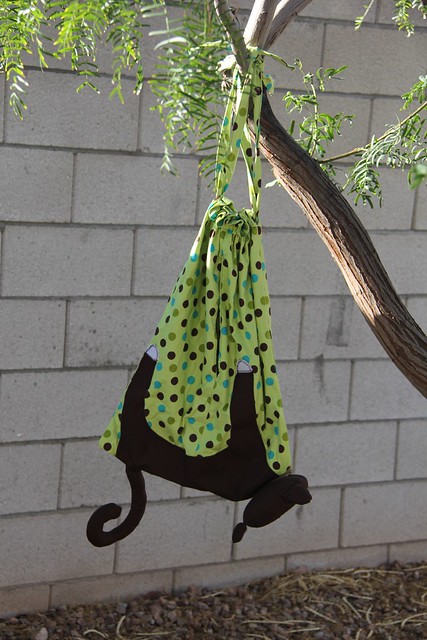
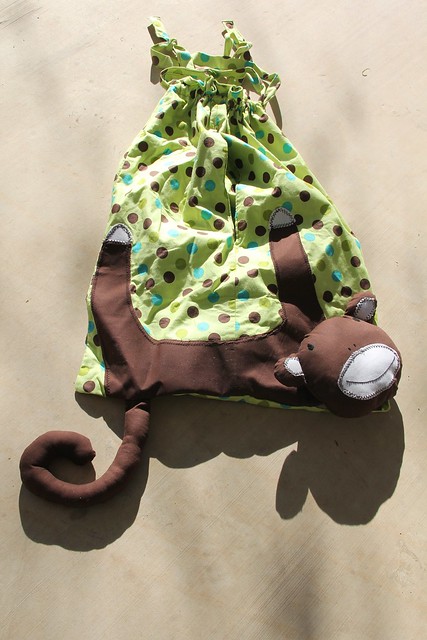
Pattern M - Cheeky Monkey Laundry Bag - Difficulty Level: 3
Nina and I have been close friends for over 15 years. We first met when she transferred to my university and joined our theatre program. During my junior year we did a production of Cat on a Hot Tin Roof together (I played "Big Mama" and she played "Mae Pollitt") and we became fast friends. We also lived in the same off-campus apartment complex so we spent many a late night together. After I graduated I moved from Los Angeles to New York City but we remained close, so close in fact that I was able to convince her to move out to NYC once she graduated and we became roommates (and co-workers) until I abandoned her moved to Chicago in 2001. Despite the distance (I now live back in Los Angeles and she, thankfully, moved back to Las Vegas so we're closer) we've remained the best of friends throughout the years. Nina is expecting her first baby next month, so of course I had to make her something and I helped her family throw her baby shower too!
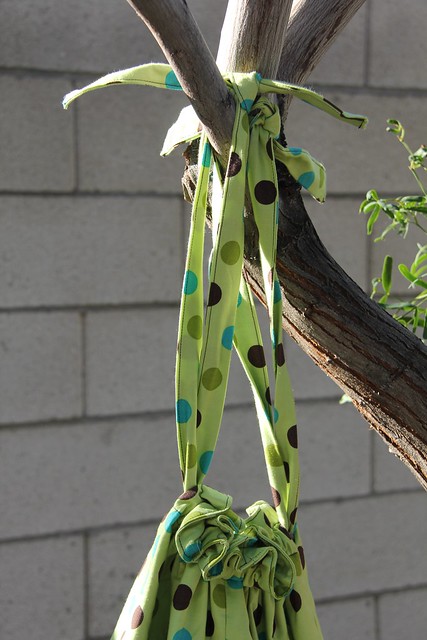
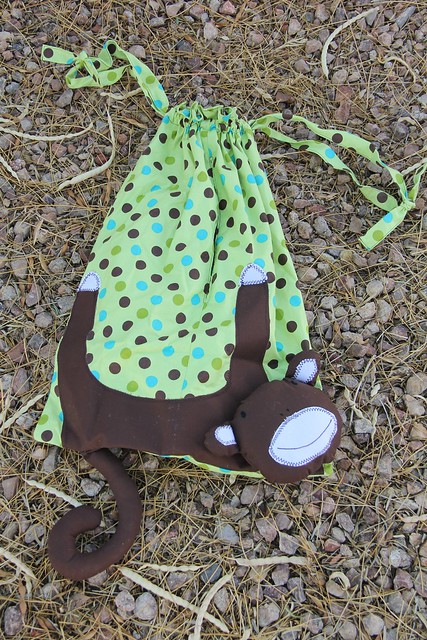
Nina and Jorge have decided to keep the baby's sex a mystery but they're going with a "Jungle" theme for the baby's room, so the Cheeky Monkey Laundry Bag couldn't have been a better choice for her first gift. I decided to go with green polka dot fabric for the bag portion to simulate a tree and keep it gender neutral.
My first, and really only, glitch was working with the Wonderunder I bought for the project. Thankfully I could tell it was going to be a problem right off the bat as I was reading through the directions so I was able to come up with an easy work around.
The directions say to apply the Wonderunder directly to the fabric before cutting out the facial pieces. The problem is that the Wonderunder I was working with didn't have a protective, removable backing (as I can only assume some brands have based on the directions in this pattern) so if I were to apply the Wonderunder at this stage as directed I would have inadvertently applied it to my ironing board cover. Instead I cut out the Wonderunder pieces separately from the corresponding fabric pieces and then applied them to each other later when I got to the stage of fusing those pieces onto the main pattern pieces.
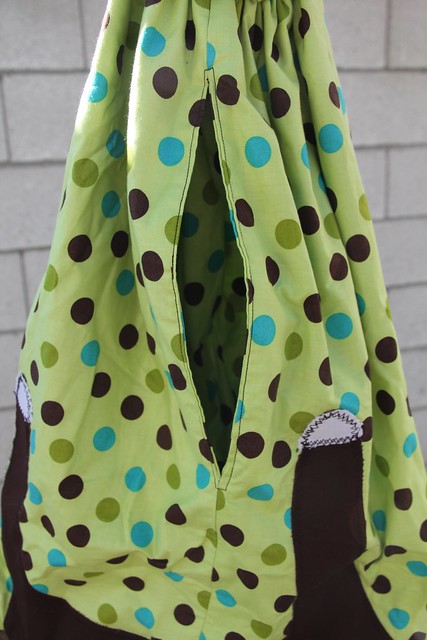
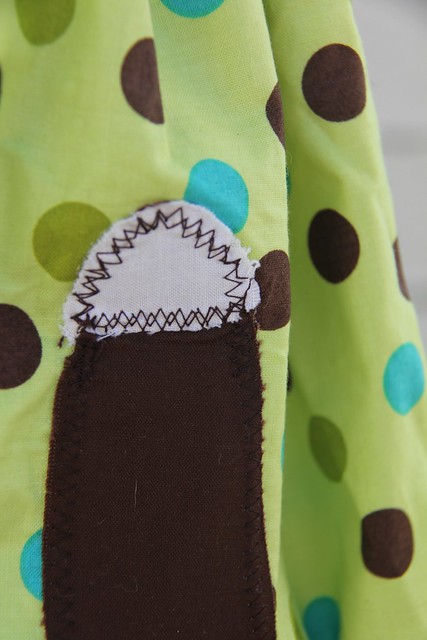
My good machine (my Baby Lock) has been fussy lately. It just means that she's in desperate need for her annual tune up. So, I resorted to using my inexpensive little Janome for this project. The stitches are limited on my Janome and it doesn't do a Satin Stitch so I had to get a little creative with the Zig Zag Stitch. I went around the applique pieces twice to create an intentional "messy" look.
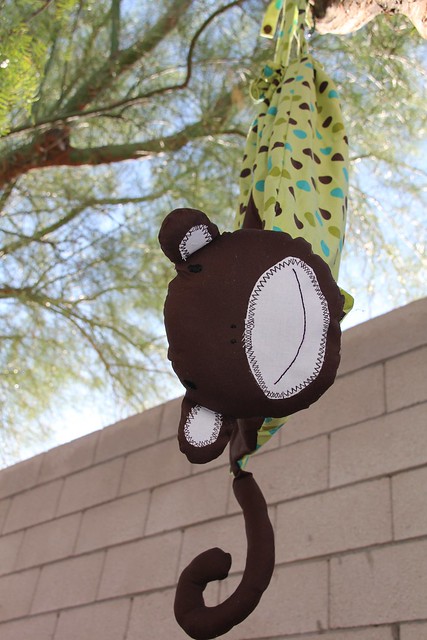
My only gripe with this pattern is the monkey head. The head isn't actually attached to the bag, it's Velcro-ed on. While I think this is for easy removal of the monkey head so you can wash the bag without washing the head, I think it makes the head lie a little wonky when it's actually attached to the bag. Mine doesn't look as good as hers does in the book.
It's a pretty easy project and it comes together quickly, and while I think this project is super-cute, I'm not sure I would make it again, unless I could figure out a way to make the head lay better.
So what are you working on? Link up your latest projects here and show everyone what you're making. You can share your projects in any state from start to finish. Remember, you can also share your "Little Stitches" Sew-Along projects anytime in the Undercover Crafter Sew-Along Group on Flickr. See you next week when I'll show you my latest finish, Pattern A: the Snuggy Baby Wrap.
Hee hee, love it!
ReplyDelete