Pattern A - Snuggy Baby Wrap - Difficulty Level: 2
Karina is another one my my oldest and dearest friends. I've known her as long as I've known Caroline and Ehren who welcomed little Arden into the world in July. All of us travelled together for a year in Up With People way too many years ago, now. I don't remember exactly how we met but all I know is that she is one of my closest friends from that year. I even spent a night at her parent's house in Germany on our semester break and I've been close with her entire family ever since. Not only am I lucky enough to still have Karina as a close friend in my life, I also have the luxury of living near her. She's been living in the Los Angeles area for many years now.
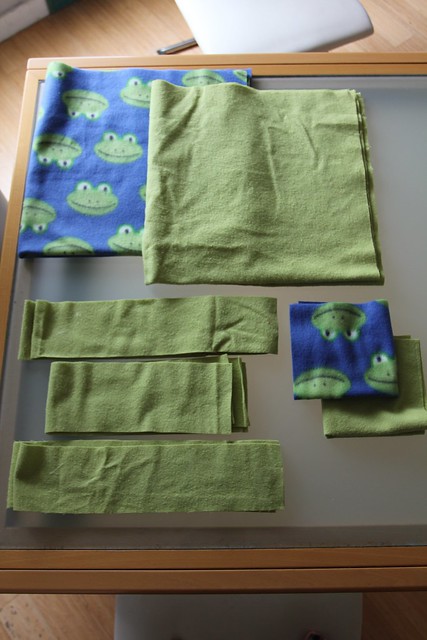
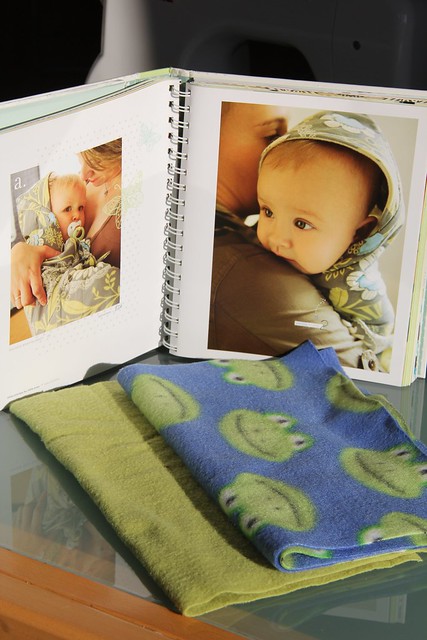
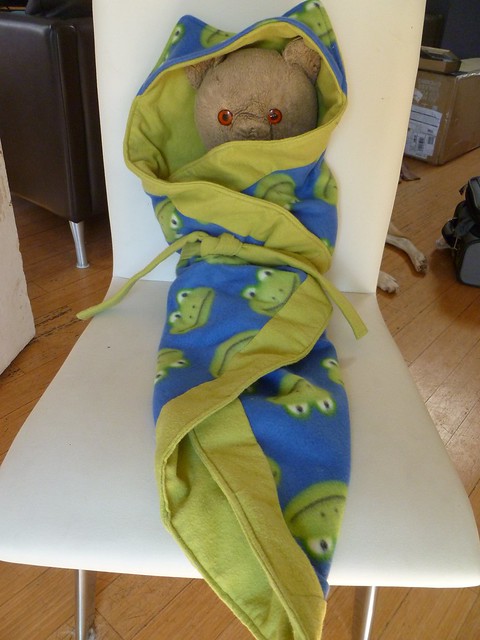
After having two gorgeous little girls, Karina and her husband Jeff welcomed a little boy (Sawyer) into their tribe just last week and he is a cutie. A few weeks before he was born, several of us gathered together to celebrate her with a shower. She had requested no clothes, and had much of the baby equipment she needed since this is her third, so I knew the snuggy wrap would be the perfect gift for Sawyer. And I wanted it to be extra snuggly so I opted to use flannel over the required cotton.

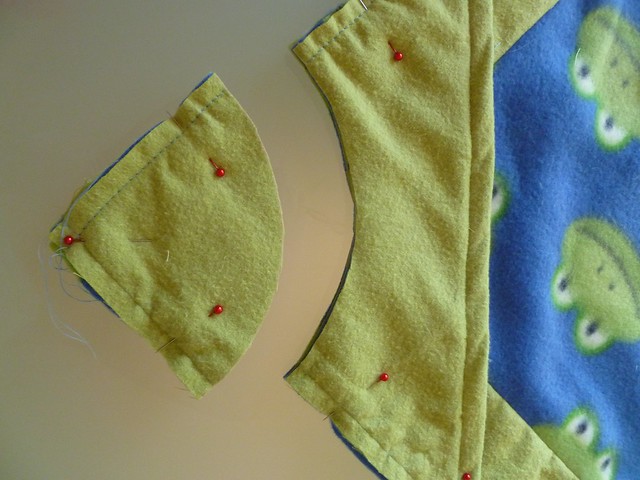
I cannot stress enough the importance of reading, re-reading and sometimes re-reading a third time the pattern instructions. My biggest frustration across the board is that occasionally the pattern instructions in the book are a little difficult to decipher at times. I swear I read and re-read the instructions for attaching the lining strips to the main fabric but I got super confused and ended up laying them out incorrectly. Thankfully, after a frantic email to Caitlin, I realized the error of my ways. Caitlin was really my saving grace. She quickly explained what I was doing wrong and then I re-read the instructions a final time and embarrassingly discovered that I had mis-read them all along. Thank you Caitlin! You saved me on this one!
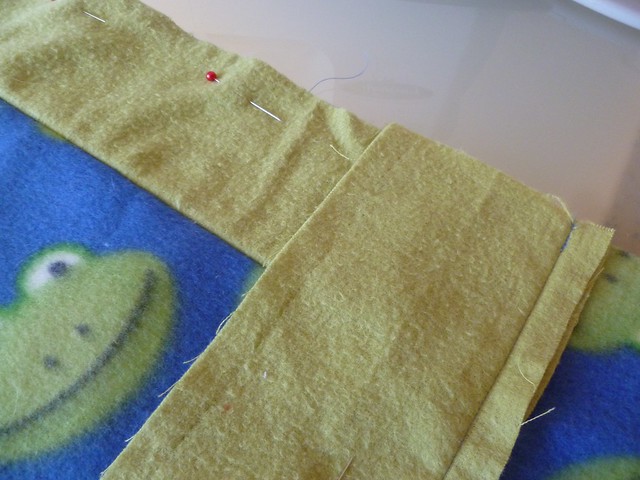
My mistake was that I was initially trying to line the strips directly up against the edge of the main fabric NOT the required distance FROM the edge of the fabric. Yeah, as soon as I figured that one out it all came together in a snap!
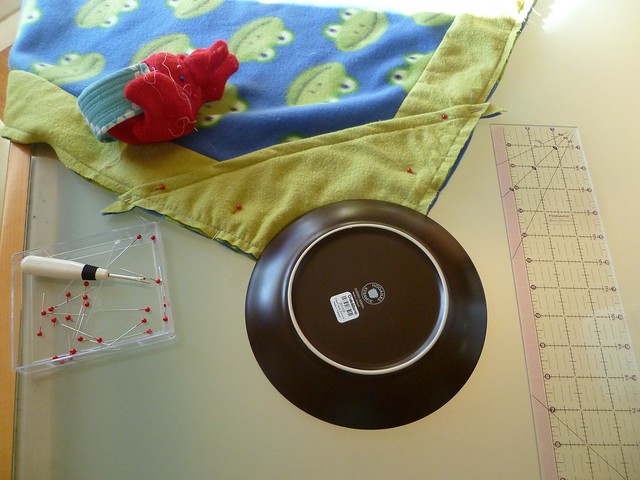
I did make one other, rather large mistake that was unforgiveable. Thankfully not SO unforgivable that I couldn't "pretend" it was intentional. Thank god it was for a boy and it was a frog theme otherwise I would have had to scrap the project altogether and start over. That's what I get for trying the whip this entire project up in the two hours I had before I intended to give it to Karina. Let this be a lesson to you all... Don't Rush and Sew!
Yeah... that plate was supposed to be put down the opposite way to make the hood correctly. And as a result the frog has eyes! At least that's what I'm calling them. And if I had more time I would have run to the nearest craft store and bought googly eyes to attach to the little peaks I created in the hood. Thankfully, Karina loved it anyway!
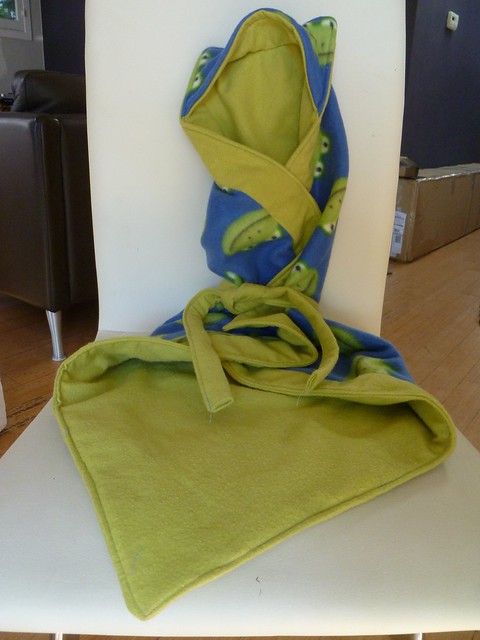
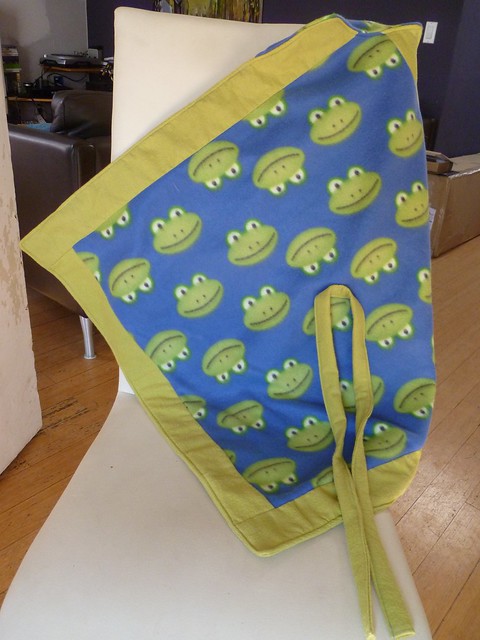
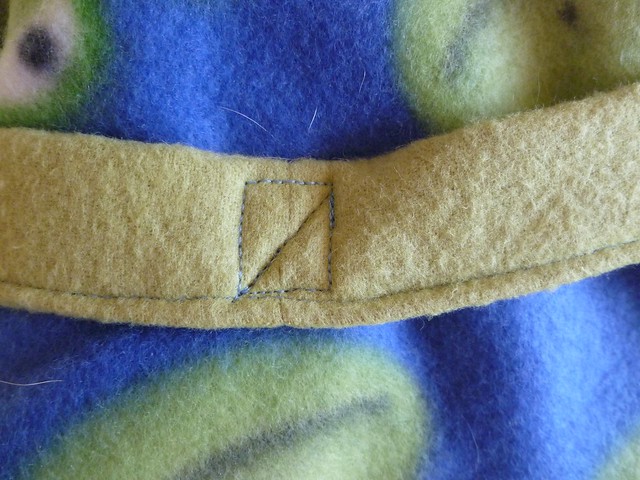
Finally, in my sprint to the finish, I decided to follow Caitlin's lead and attach the strap by sewing it on. Honestly, it was because I couldn't find my buttonhole foot and I was running out of time. But I did also like the way Caitlin's turned out. And I also decided to make the inside the outside which worked because I was using flannel instead of cotton.
This project was so super simple and quick, really. If it weren't for my rookie mistakes and trying to rush through it I wouldn't have had any issues at all. I am planning to make more of these for my friends since it's such a fast and easy project to whip up in a pinch. Not to mention it's super cute too!
So what are you working on? Link up your latest projects here and show everyone what you're making. You can share your projects in any state from start to finish. Remember, you can also show off your "Little Stitches" Sew-Along projects anytime in the Undercover Crafter Sew-Along Group on Flickr. See you next week when I'll show you my latest finish, Pattern E: The Comfy Jumper Dress.
Man that snuggy wrap did give you a run for your money! LOL :) I'm glad I could help you with those lining strips. The instructions did leave a little to be desired. Yours turned out so cute though! and I love that you used the inside as the outside, and of course, the flannel was an awesome idea :)
ReplyDeleteAww, that is really cute! too funny that her directions are so difficult even when it's not a bag. why oh why can't she include some more diagrams!? I definitely want to make some of these though, I have to get some snuggle fabric!
ReplyDeleteWhat a darling gift - the "ears" look totally cute!
ReplyDeleteIt looks so cosy!
ReplyDeleteSuper cute is right. Used it for my little man's first bath and it will be in our memory for ever.
ReplyDeleteOh! I'm so glad!
Delete