Oh, how I love the iron. Forgive me while I wax poetic a moment. In high school, when I was trying to raise money to travel with Up With People, I started an odd jobs business around the neighborhood and I ended up doing a lot of ironing for one of our neighbors. Thankfully, I discovered that it wasn't a household chore I particularly minded all that much. I was used to wielding a iron on my sewing projects so it was a natural fit.
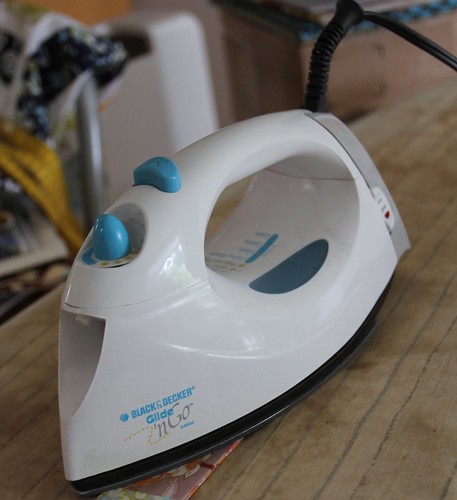
Even now, I don't mind ironing. My iron is a powerful tool that I use constantly while I am quilting. I know there are many debates about there about wether to press your seams open or to the side. I've experimented with both ways and I have to admit that I am partial to pressing seams open. I am not saying that this is the "correct way" to do it. There is no right or wrong way. It just happens to be the way that works best for me most (but not all) of the time. Why do I prefer to press my seams open? Well, the answer for me is pretty simple. I find that I get flatter, truer seams when I press them open. I used to press to one side and I often found that my seams would get bulky or I would start to loose a scant bit in the seams. This would sometimes result in slight folds in the seams or blocks that were slightly smaller than anticipated. So one day I tried pressing my seams open and I was happier with the overall result - flatter, straighter blocks and seams.
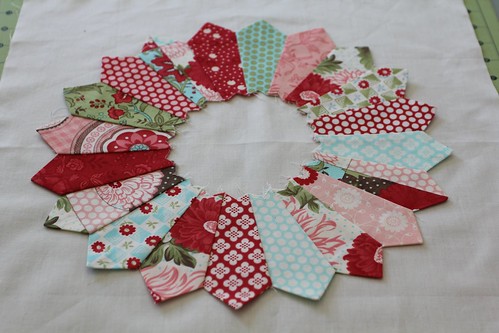
That said, pressing my seams to the side is what saved this block. Kelly sent everyone in the Red and Aqua 2 Bee precut fabrics for this block with a simple tutorial from Sew Mama Sew. The pattern calls for 20 petals and since I was making this block for someone else and not myself I wanted to get it right rather than send it to her with 19 petals. After I ripped it apart I started re-sewing it back together again this time with a much smaller seam allowance than the requested 1/4". Of course the result was too large a center to be covered by the fabric circle she sent along so I went around again with my 1/4" foot. And then I took it to the ironing board and ironed the seams TO THE SIDE. That is the secret! I cracked the code.
If you are struggling with the Dresden Plate Block, like I was, try ironing your seams to the side. This way you can "fudge" your seams a little and you can work the seams with your iron to help your dresden lay flat. Then iron the hell out of it when you flip it over and pin the hell out of it when you place it on the background fabric. Lastly, when you're sewing the petals down take it SLOW. If you ended up "fudging" any of the seams when you ironed it there may be some scant folds in the fabric that might bunch if you aren't patient. Don't be afraid to slow down as you reach each seam, anchor your needle and lift your presser foot to avoid bunching at the seams.
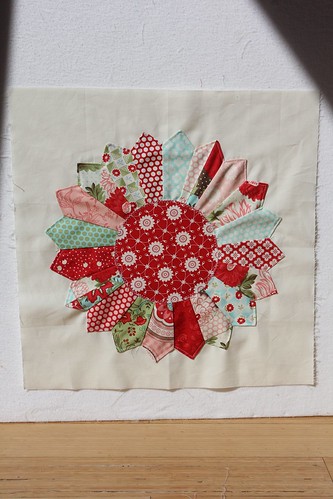
Does this all make sense or have I totally confused you all? I know I have a tendency to get overly verbal, especially when I'm excited. I hope this helps someone else out there who may be struggling like me. And for those keeping score: Dresden Block: 1, Hollie: 2. I pulled it out with a Hail Mary just before the buzzer!

I'm linking this finish up to Sew Modern Mondays at Canoe Ridge Creations.
Yay!!! You did it! It looks great!
ReplyDeleteyou are AWESOME! Great job cracking the code!
ReplyDeleteYAY! I am so happy for you!
ReplyDeleteI will for sure remember to do Dresdens to the side. Thanks a bunch!
Great job! Way to stick with it! And thanks for the seams-to-the-side tip. I never would have thought of that. It's funny how sometimes seams work SO much better open, and other times they work SO much better to the side!
ReplyDeleteYAY! It turned out great. Thanks for the tips. I haven't attempted a dresden yet, but I'm glad i have some advance knowledge. ;)
ReplyDeleteTake that little Aqua and Blue dresden! :) Thanks for linking up to {Sew} Modern Monday! Have a great week!
ReplyDeleteYay!!! It looks gorgeous, too.
ReplyDeleteOhhh I love it!! It's super !!! Thank you so much for sharing about the seams pressed to the side!!
ReplyDeleteAnd thank you for coming over to my blog and leaving me such a cute comment!!!
Eleni @sewhappiness
Congrats on finishing it! Your block looks beautiful :)
ReplyDeleteThe result is worth the struggle. Lovely block!
ReplyDeleteThis looks great!It was worth all that effort!
ReplyDelete