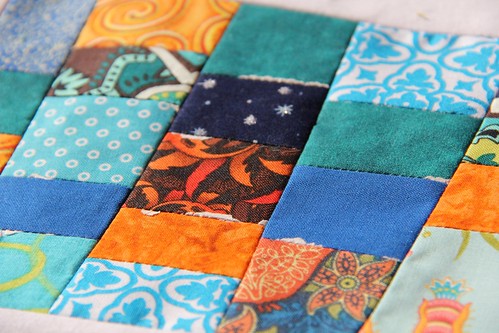
Close-up of one of the blocks with a little (oops!) freezer paper still waiting to get picked off.
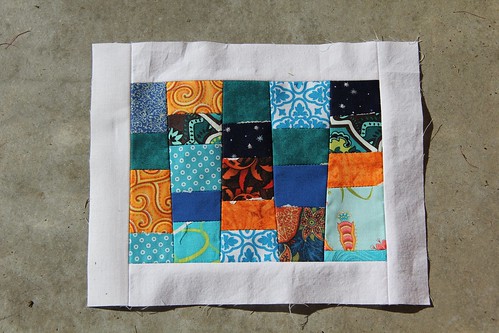
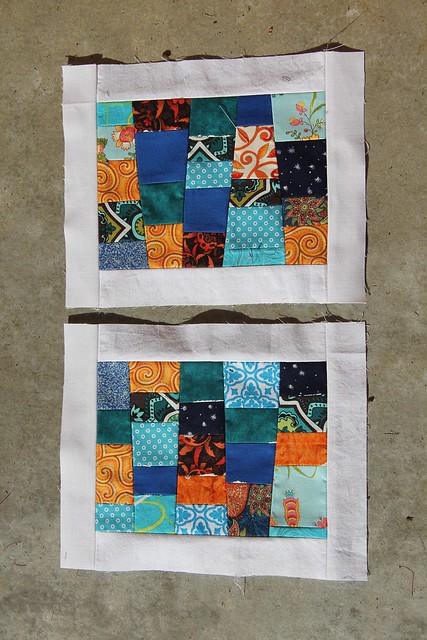
Flaun sent each of us a pile of her scraps and asked for two Map of the States blocks using the Oh Fransson! tutorial found here.
The scraps she sent me were full of shades of blue with a little orange thrown in for good measure (a color combo I love) and they were really fun and easy to make. Thanks to her I have discovered a new love for freezer paper. Seriously why didn't I know how useful it was before? Did you have any idea that you could iron it on to fabric? It sticks and then is easily removed without harming the fabric. Awesome little tool I say!

These blocks are a great way to not only showcase fabrics but also bust your stash of scraps, which I need to do myself. The only snafu... I did run out of the white fabric that Flaun sent along for the sashing but I had some Kona Snow in my stash so I was able to remedy that easily.
TIPS for Map of the State Blocks:
1) Make sure your scraps are big enough to allow for the 1/4" seam allowance above and beyond the "template" size.
2) Trim the 1/4" allowance truthfully (this can be a little tedious) using your ruler and rotary cutter. This will help you immensely when the sewing begins.
3) Keep track of the top and number of each row of scraps by either leaving on one of the freezer paper "templates", marking with a disappearing pen (or chalk) or simply using straight pins.
4) (This is where my lack of math skills really shines!) Remember to give yourself a 1/2" gap between pieces when ironing on two or more "templates" to a piece of fabric so each piece gets it's proper 1/4" allowance. You would think this goes without saying, right? Nope. I'm a blonde at heart and made that mistake so if Flaun is looking carefully she will notice a couple scraps with slightly less than the desired 1/4" seam allowance.
I hope Flaun is pleased with the results. I can't wait to see her finished quilt.
they are beautiful. i love your tips you always give after you finish a project. i also learned a new word- snafu- ha! :)
ReplyDeleteMy mother is big into freezer paper applique, so into it that as I child I thought applique was it's only use :) It's handy stuff.
ReplyDeleteOf course I love them! I'm just about as excited as you are, I think, to see the finished project. Thanks so much for playing along.
ReplyDelete