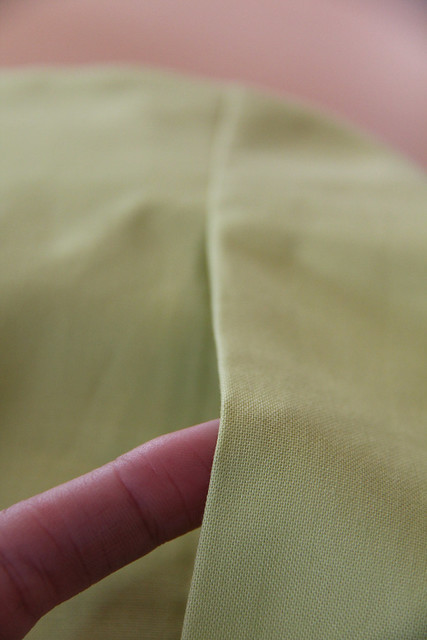
I find it easier to iron the seam I am closing first, so it creates a natural crease along the seam line. This fold will act as your guideline and ironing it down will help ensure that your seam will lie flat and naturally against the rest of the seam.
Loop your thread through your needle so you create a double strand, matching the ends together. Create a double knot to secure the ends. A double knot will better help anchor your thread in the fabric, so it doesn't pass all the way though.
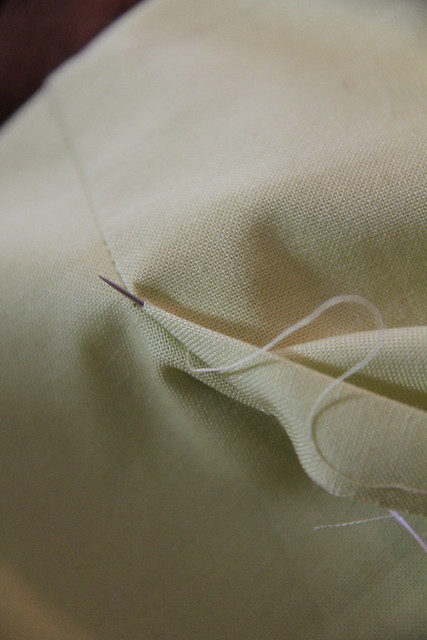
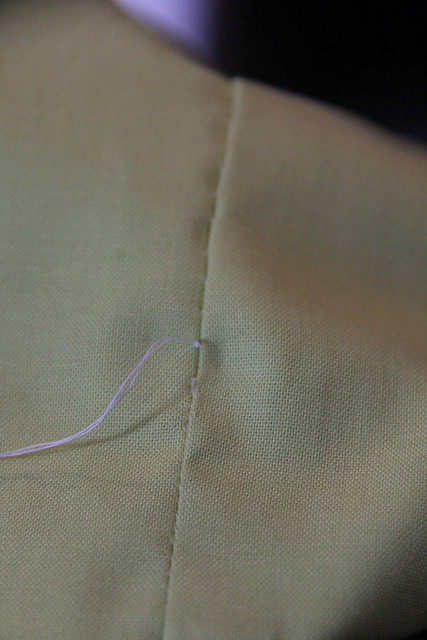
Bring your needle up though the right side of the crease on one side of the seam, as close to the end of your machine stitching as possible.
Pull your needle and thread though all the way until the knot meets the underside of the crease. Now your knot should be hidden in the fold on the wrong side of the fabric.
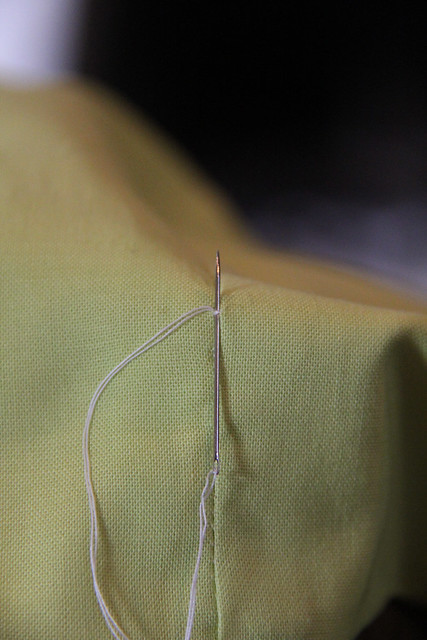
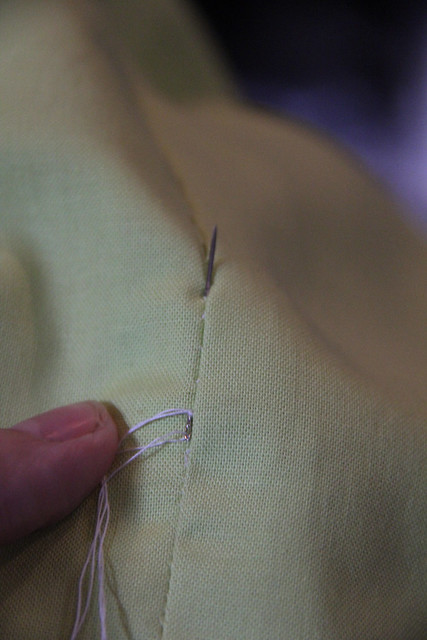
Working on the right side of the fabric, and side A of the fold, place the tip of your needle through the crease on the opposite seam edge (Side B). The key is getting it directly across from where you came up so the stitch essentially disappears and lies flat.
Work the tip of your needle into the fold on Side B (and on the wrong side of the fabric) but not through both layers - only the top layer. You want to nestle your needle so it's sandwiched along the crease and between the two layers of fabric that create the fold of that side of the seam. Bring your needle back through the right side of fabric at the crease on the same side (Side B) about 1/4" from where you inserted your needle. Think of it as hiding your thread / stitch directly in the crease.
Pull your needle and thread all the way through on the right side of the fabric on Side B and pull tightly to create your stitch.
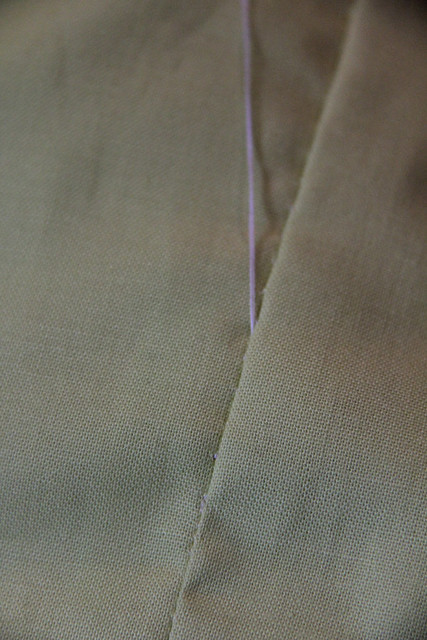
Repeat this on the opposite side of the seam (Side A). You stitches will alternate from one side of the seam to the other until you reach the end of your opening and the beginning of your machine stitching.
To finish your seam, once you reach the opposite side and the machine stitching, loop your needle under the first stitch of machine stitching.
Bring your needle through the loop and create a single knot around the stitch.
Insert your needle at the knot and pull it back though the seam as far as you can go with the needle, then come up again on the right side of your fabric.
Clip the tail of the thread as close to the fabric as you can without cutting the fabric. Pull the fabric slightly to pull the tail back down into the seam and hide the loose ends.
Walla! Now you've created an invisible seam. You can use the same basic technique when hand binding your quilts. You binding will already have the natural crease, but your quilt backing obviously won't. Apply the same theory, but one side of your seam will be flat so you will have to "imagine" a crease there, but it will work the same.
Please let me know if you find any of this confusing so I can clarify my instructions. I hope this helps. Do you have a great Tip, Tool or Technique that you'd like to share? Email me and I'll set up a guest post for an upcoming edition of Triple "T" Tuesdays.




Wow...awesome...Thanks for a great tutorial!
ReplyDeleteYou're so welcome! Hope it's helpful.
DeleteIs this also called the "ladder stitch"? I don't know whip stitch from slip stitch from ladder stitch...I just know I do what you're showing, but thought it was called a ladder stitch. Not that what it's called matters as long as it holds the binding in place.
ReplyDeleteThanks for this! It inspired me to pick up a few pillows I needed to slip stitch close last night which I'd been avoiding since I didn't like how it turned out last time I tried it. Thanks to your tutorial they look much better now!
ReplyDeleteGreat tutorial!
ReplyDeleteThanks Ashley!
DeletePerfect! So helpful. Thank you. :)
ReplyDelete