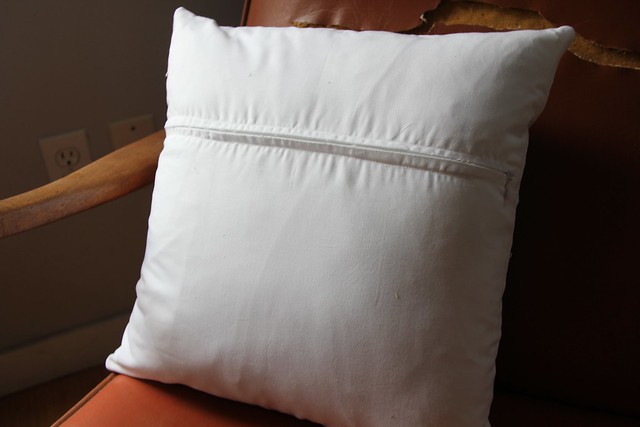
I hear from a lot of quilters that zippers are intimidating. But I don't think they should be. I started as a garment sewer so zippers are second nature to me, but they don't have to invoke fear in the hearts you quilters out there. Last night, I was putting the finishing touches on a couple pillows and I decided that I wanted to add zipper closures to both, since they add a more fitted quality to your pillows. And I decided I would create my first tutorial in the process.
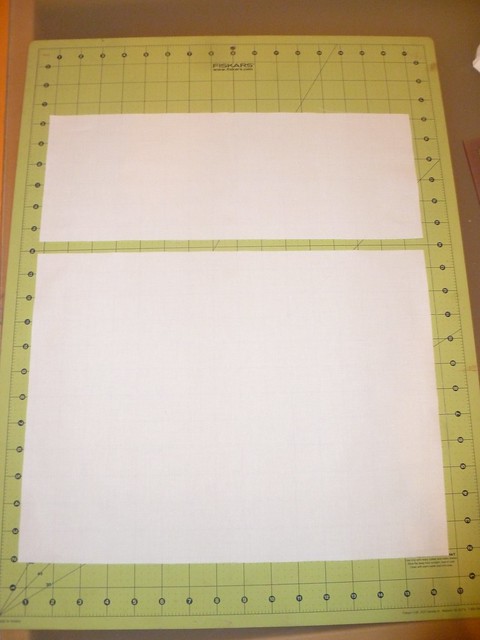
Step 1: Since this was for a pillow backing I cut the fabric where I wanted the zipper closure, so I had two pieces of fabric of the same width.
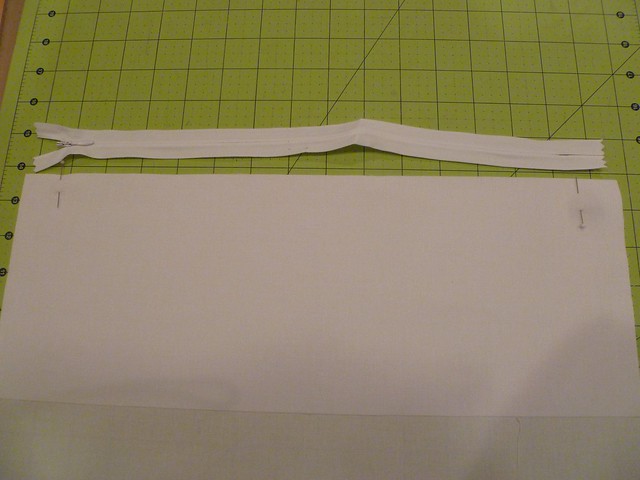
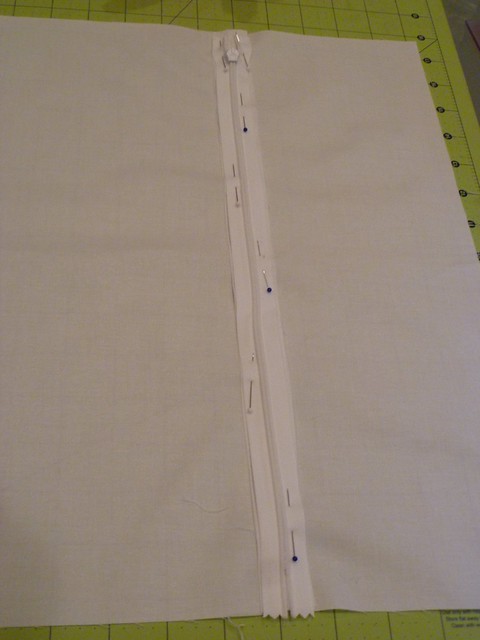
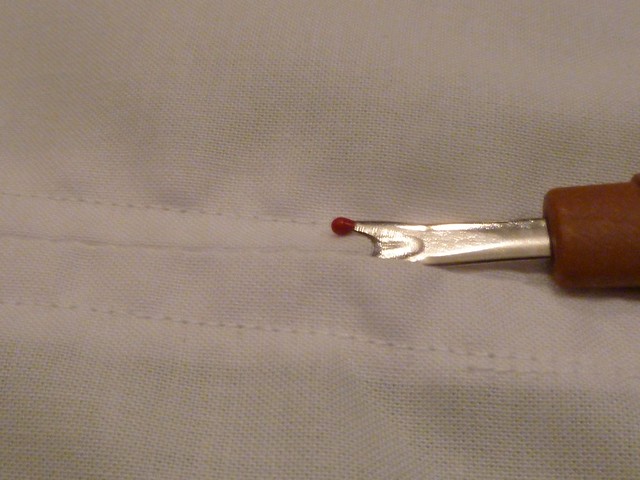
Step 2: Place your two pieces of fabric, right sides together, matching up the edge where you want to insert the zipper. Using a zipper slightly shorter than your fabrics, center it and note where the head of the zipper begins and zipper ends. I'm not talking about the fabric head and tail on the zipper but the actual zipper itself. Mark these points on your fabric using straight pins.
Step 3: Starting at one end of the fabric, sew a 1/2" seam (backstitching at each end) to the first pin. Do not cut your thread. Instead keep your machine in the needle down position, and adjust your stitch length all the way to the longest stitch legnth and continue to a 1/2" seam using the basting stitch all the way to the other pin. Once you reach the other pin, drop your needle again and revert your stitch length back to normal to finish out your 1/2" seam (backstitching at each end). **I know most quilters are used to working with 1/4" seams but it's very important to create a 1/2" seam when inserting a zipper for security. If your seam is too narrow you risk not stitching your zipper into your seam properly AND the zipper might not hold up as well over time with all the stress put on this seam.**
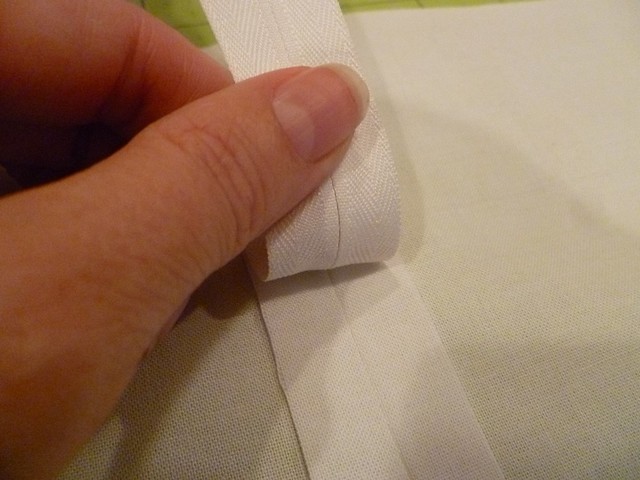
Step 4: Press your seam open. It's important to press your seam open and not to the side because this is where you are going to attach each side of the zipper.

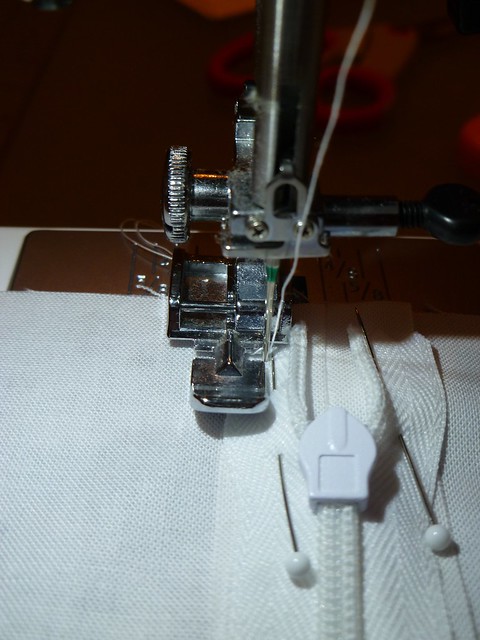
Step 5: With your fabric Right Side Down, place the head of your zipper at the point you marked in Step 2. Your zipper should be Right Side Down against the Wrong Side of the fabric. Pin the head of the zipper in place, taking care to ensure that the zipper sides are over the fold in your seam.
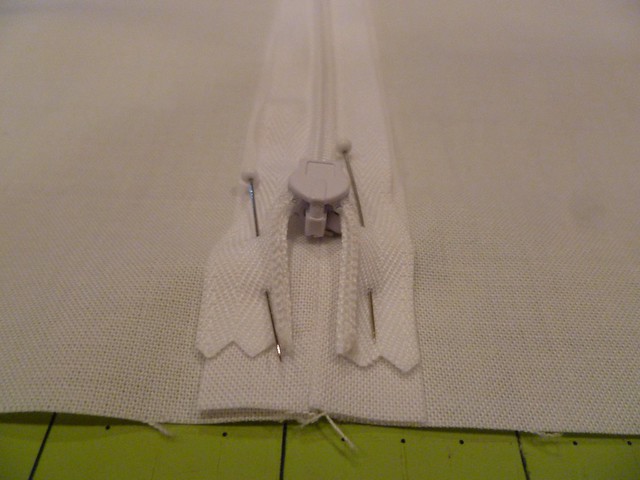
Step 6: Carefully align the center of your zipper flush with the center of your seam, pinning occasionally as you go.
Step 7: Attach your machine's Zipper Foot.
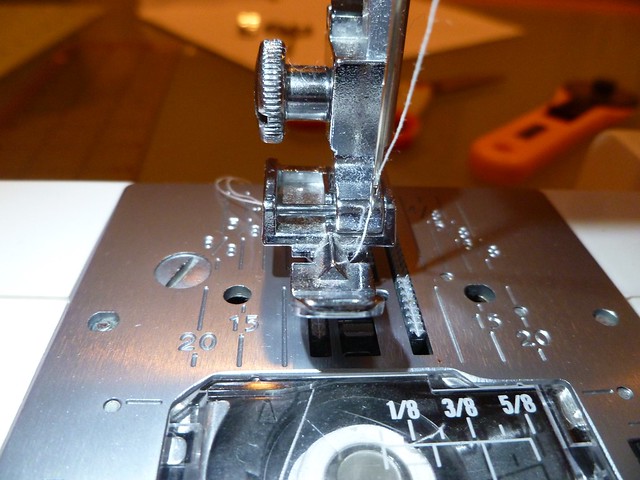
Step 8: Starting at one end, backstitch to secure then stitch all the way down one side of your zipper. I use the middle of my zipper foot as a guideline. Take care as you stitch around the zipper head, this is where most stitching errors occur. Make sure you have enough room to get your foot around the head of the zipper, but you are still stitching all the way through the zipper fabric and your seam.
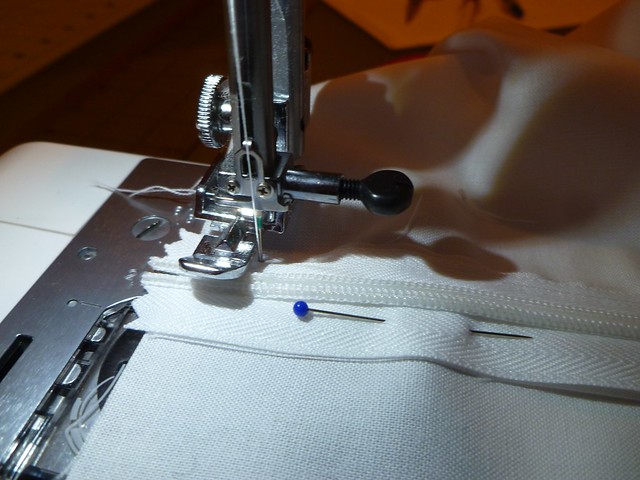
Step 9: Stop stitching just below the metal tail of your zipper. Drop your needle and pivot, making a 90 degree turn. Continue stitching to the other side of the zipper. Again, drop your needle and pivot another 90 degrees, then continue your stitching all the way back up the other side of your zipper. Backstitch at the other end.
Step 10: Using your seam ripper, carefully cut your basting stitches. Don't rush. It's easy to clip more than just the basting stitches, or even worse, rip through your zipper or fabric if you're not paying attention.
Step 11: Pick out your loose threads and you're done. It's that easy! You're ready to take your zipper for a test drive.
Hope this helps! Do you have a great Tip, Tool or Technique that you'd like to share? Email me and I'll set you up to do a guest post on an upcoming edition of Triple "T" Tuesdays.
Great tutorial! I've never had a problem with zippers, but you're right...I know a lot of people shy away from them thinking that they're complicated.
ReplyDeleteGreat tutorial, Hollie!
ReplyDeleteI learned to sew making garments too and this is the way I do my zippers with one exception. I was taught to baste one side of the zipper tape to the seam allowance before sewing the zipper in place. This step is probably unnecessary if you pin well. Thanks!
I'm not afraid of zippers either, but there are SO many different ways to install them! I hadn't seen this method before. Thanks for the tutorial!!
ReplyDeleteThanks for sharing this. I don't baste, and I also don't usually make the 90-degree turns to insert the zipper in one continuous stitch line, but next time I am going to try these. Your finished product looks so perfectly lined up. I bet those details help!
ReplyDeleteThank you!!! This tutorial is just what I needed!!
ReplyDeleteThank you! Your tutorial is wonderful - I read through it twice, went to my sewing machine and sewed a perfect zipper at first attempt. Thanks again!
ReplyDeleteThank you, thank you, thank you !
ReplyDeleteI am soooooooo grateful for this toot- bless you !
Wow! You're so welcome! I hope it helped.
Delete