It's time for another Triple "T" Tuesday. I know, it's been a while. How many of you out there wish you had a Serger in your arsenal to help give your garment seams a finished look? Did you know you can achieve something very similar with your own machine? If not, then I'd like to introduce you to the Overlock Foot.
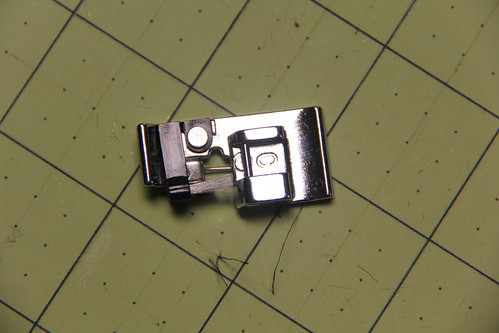
Many of you might already have this little beauty in your tool kit and not know it. If you don't, it's a heck of a lot cheaper and easier to just buy one of these little babies than to go out and buy a whole new machine. Granted, in quilting there's not much need to finish your seams, although I do know some people who like finishing their binding to reinforce it. I haven't tried that yet, but I just might on my next quilt. But if you're even thinking about garment construction this little beauty will definitely come in handy.
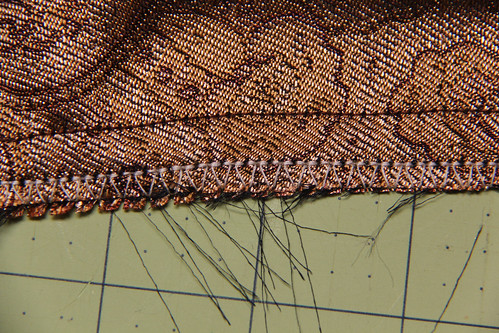
(The Top Side of the Overlock Stitch)
Recently I was making some dresses for my nieces and I wanted to reinforce the seam allowances for two reasons: I was too lazy to line the dresses and regardless of lining and I didn't want my seam allowances to start fraying after just a few wash and wears. So, rather than buy a Serger, I just pull out my trusty Overlock Foot. It's easier than pulling out another machine.
Every machine is different so be sure to read your manual for stitch settings but here's how I use mine. Swap out your foot as normal. Although this foot looks a little funky, you should be able to use it with the same arm you use for your 1/4" foot. You're not going to stitch with the same settings though, so make sure you know what works for your machine. Here are my normal settings:
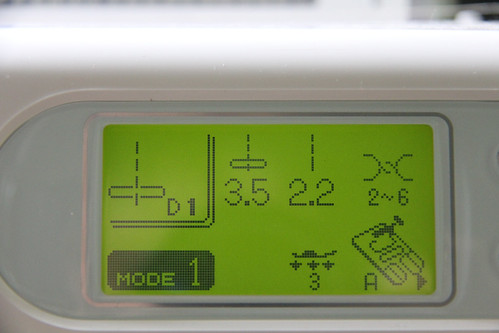
And the settings I use for the Overlocking Stitch:
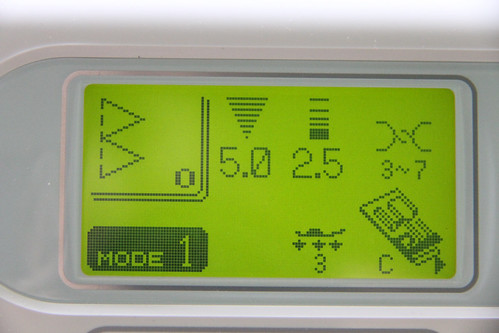
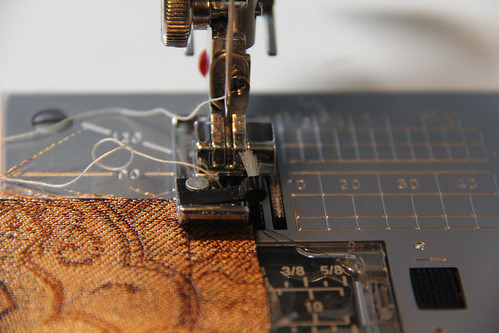
On my machine all I have to do is change the mode and the settings automatically change. Line up the raw edge of your seam allowance with the little knob on the right edge of the foot. Then just stitch as you would a straight stitch. The machine is going to work a little slower and be a little more jerky than when you're doing a normal straight stitch but the machine does all the work. It's amazing! And when you get to the end you've got a professional looking, locked seam allowance. And no more fraying! Easy peasy, right? Seriously, I'll never finish another garment without it.
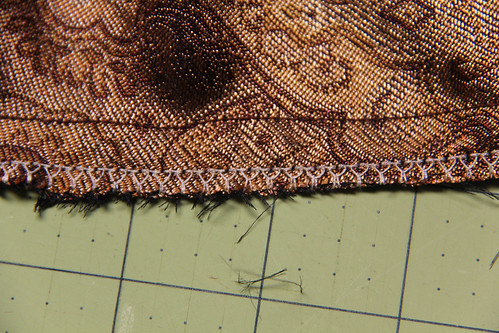
(The Under Side of the Overlock Stitch)
Hope this helps! Do you have a great Tip, Tool or Technique that you'd like to share? Email me and I'll set you up to do a guest post on an upcoming edition of Triple "T" Tuesdays.
Thanks for this! I've been considering getting one of these feet. Now that I see what it does, it's definitely in my wish list.
ReplyDeleteGreat effect (although I actually have an overlocker)
ReplyDeleteWow! Thanks! I have that foot on my Janome too! Great tip!
ReplyDelete